2022 Tab 320 CS-S Lithium Conversion and Relocate

Middleagedmissile
Member Posts: 1
Relatively new to the forum and a new owner of a Tab 320 CS-S Boondock. I recently sold my 2016 Lance 1685 travel trailer when I decided to downsize my TV from a V8 Chevy Silverado to a 2025 Ford Maverick Hybrid with tow package. The chevy was simply awful, multiple lifter failures and transmission issues which resulted in a new engine at 52k miles under warranty. My distrust and dislike of the truck was so strong I decided to downsize, hence the Maverick. I subsequently picked up a 2022 CS-S in like-new condition and decided to convert the rigs lead acid battery to lithium and move the battery to the cabin.
I estimate I removed about 65lbs of battery weight from the front of the camper but I added three new Seabiscuit boxes that I expect when full will near equal what I removed. The new 280ah battery weighs 60.4 lbs and with the weight of the inverter and other accessories I estimate I added around 72lbs to the rear of the camper.
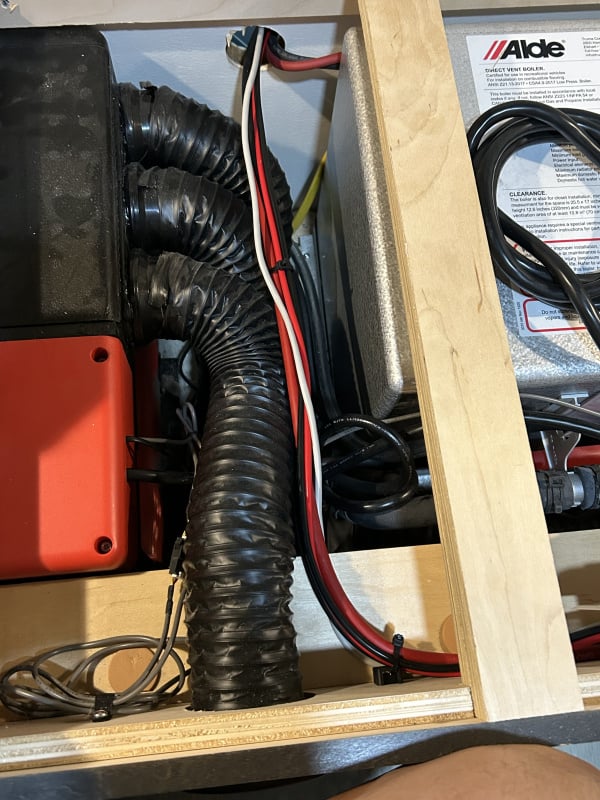
The only real difficulty I encountered while installing was the loss of my Alde display. I assumed the 12v DC connector hot and ground were both connected to the converter and main ground buss. I spent a lot of time troubleshooting before I realized the positive cable was tied into the converter but the negative wire connected to the original battery, which I of course had removed. I rerouted the negative wire to the grounding buss and everything was ok. I expect I will reroute further and connect to negative battery buss in order to get a better measure from the smart shunt. Working underneath the cabinetry was a bit difficult visually and hard on the back at times but I am pleased with the result.
Left to complete….connect battery cut-off switch and rewire emergency disconnect brake wire from front to new battery connection. Cover connections with electrical tape. I am considering placing a removable verical “splash panel” next to battery to avoid any water splashing on electrical componetry in the event of a water line break and to protect components from shifting items in cabinet while underway.
One last thing…the WFCO still doesn’t autodetect.
I discovered that the rear galley model of the Tab 320 loses a lot of space vs the standard model to accomodate the clamshell enclosed kitchen. This was more obvious after reviewing similar relocations on this forum of the conventional 320….I immediatly envied the room! After much measuring and contemplation of the space available in the underside of the passenger side bunk, I decided to move the new 280ah battery to the rear galley. I preferred to keep the interior space under the bunk for storage and the battery was a very tight fit under the bunk. The battery fit perfectly, kind of, between the wheel well and wall of the underseat cabinetry. It fit perfectly until you attempted to remove it. It was essentially shoehorned into the space. I believe 2 100ah batteries might have been better accommodated.
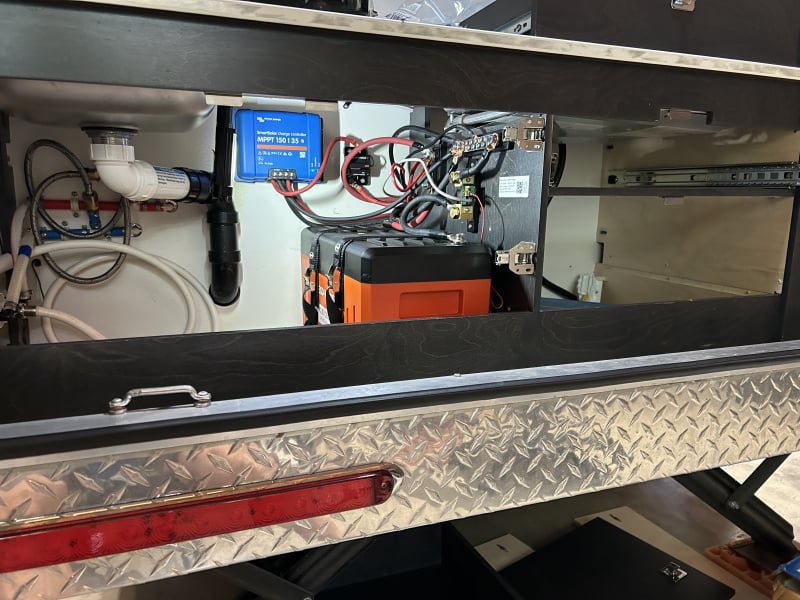
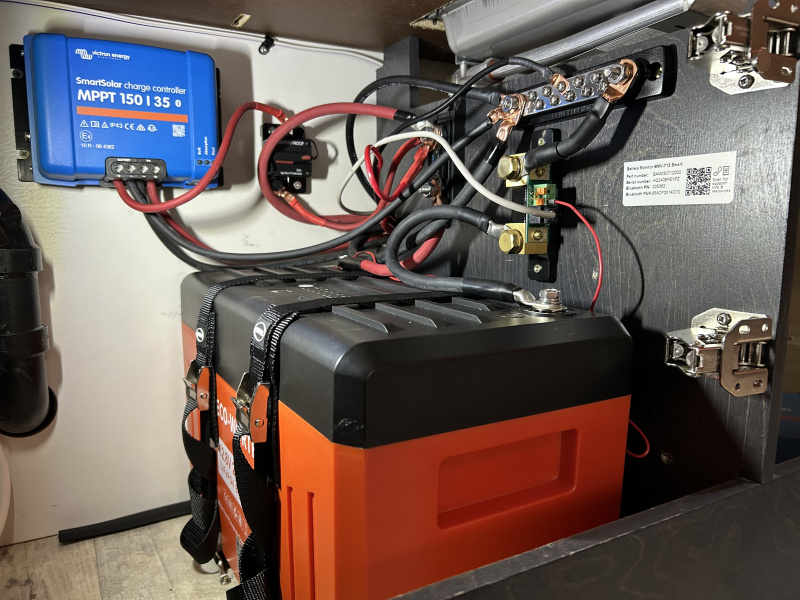
I utilized heavier guage all copper wire for the relocation of battery and accessories vs the small 10 guage wire from the factory. The following photos are post installation of the battery, new solar controller, inverter, and related fuses, breakers, and upgraded wiring.
New components installed:
Eco-Worthy 280ah LifePo4 Smart Battery
Victron Phoenix 1200 Inverter
Victron 150/35 MPPT SmartSolar Controller
Victron BMV-712 Smart Battery Monitor with Shunt
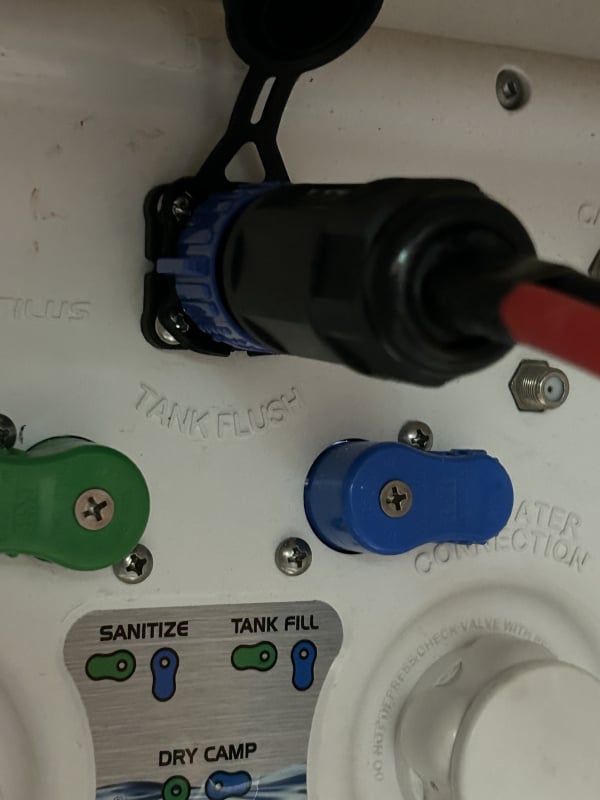
50 amp solar port with locking connector installed in nautilus compartment.
New components installed:
Eco-Worthy 280ah LifePo4 Smart Battery
Victron Phoenix 1200 Inverter
Victron 150/35 MPPT SmartSolar Controller
Victron BMV-712 Smart Battery Monitor with Shunt
50 amp solar port with locking connector installed in nautilus compartment.
40ft 8awg wire for suitcase connection with locking house plug on camper end and solar connectors for suitcase.
Blue Sea Buss Bars and Victron 150a mega-fuse holder
Renogy 300W solar suitcase. Total solar capacity now 405W.
Photo of installation with doors and drawers removed
6awg wire from battery buss to converter. I would prefer heavier guage but short run and low power load made it unnecessary.
2awg wire battery to shunt and both buss bars
8awg wire from new MPPT controller to 50amp breaker and buss bars and also from connecter to suitcase.
10awg wire from original Victron 50/10 MPPT as 8awg would not fit small controller.
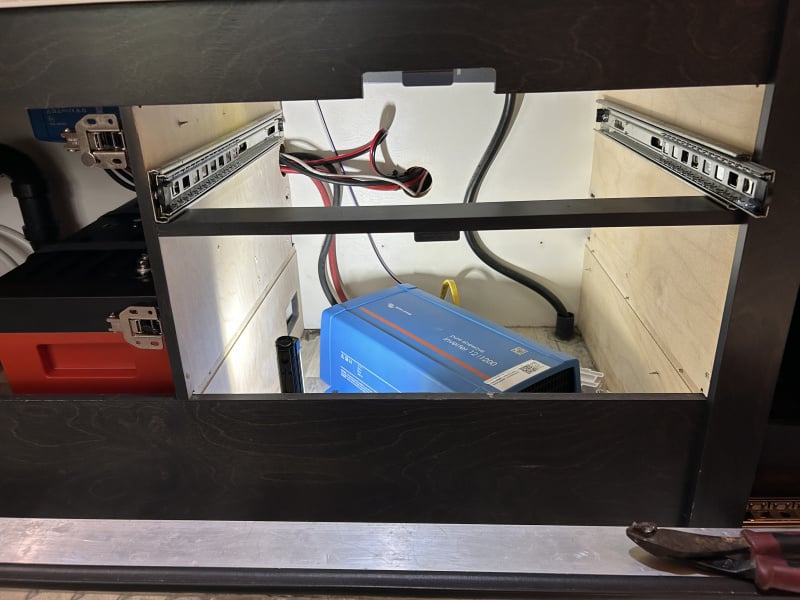
View from rear of camper to underside storage with doors and drawers removed
.
I discovered that there was a false bottom under the lower drawer that revealed quite a bit of usable space. I removed the wooden panel and used the space to install the inverter and route wiring after drilling a hole through the bulkhead.
The inverter was mounted diagonally to allow access to switch and plug.The lower left side reflects a hole where an AC outlet was mounted. I will relocate that outlet to the front of the cabinetry.
 "
"
I discovered that there was a false bottom under the lower drawer that revealed quite a bit of usable space. I removed the wooden panel and used the space to install the inverter and route wiring after drilling a hole through the bulkhead.
The inverter was mounted diagonally to allow access to switch and plug.The lower left side reflects a hole where an AC outlet was mounted. I will relocate that outlet to the front of the cabinetry.
"I estimate I removed about 65lbs of battery weight from the front of the camper but I added three new Seabiscuit boxes that I expect when full will near equal what I removed. The new 280ah battery weighs 60.4 lbs and with the weight of the inverter and other accessories I estimate I added around 72lbs to the rear of the camper.
The only real difficulty I encountered while installing was the loss of my Alde display. I assumed the 12v DC connector hot and ground were both connected to the converter and main ground buss. I spent a lot of time troubleshooting before I realized the positive cable was tied into the converter but the negative wire connected to the original battery, which I of course had removed. I rerouted the negative wire to the grounding buss and everything was ok. I expect I will reroute further and connect to negative battery buss in order to get a better measure from the smart shunt. Working underneath the cabinetry was a bit difficult visually and hard on the back at times but I am pleased with the result.
Left to complete….connect battery cut-off switch and rewire emergency disconnect brake wire from front to new battery connection. Cover connections with electrical tape. I am considering placing a removable verical “splash panel” next to battery to avoid any water splashing on electrical componetry in the event of a water line break and to protect components from shifting items in cabinet while underway.
One last thing…the WFCO still doesn’t autodetect.
0
Categories
- All Categories
- 10 Cirrus Truck Campers
- 122 Dutchman and Vintage TaB Archives
- 3 Forum Rules
- 3 nüCamp & Forum Contacts
- 958 Air Conditioning & Refrigeration
- 2.6K Battery/Electrical & Solar
- 1.2K Camping & Travel
- 143 Events & News
- 219 Factory Comments
- 20 "FOR SALE" - New/Used Trailers
- 13 “FOR SALE" - Camping & Trailer Gear
- 2.4K Heating/Plumbing & Winterizing
- 141 Help - Computer & System
- 922 Introductions
- 408 Looking to purchase a trailer?
- 2.1K Modifications & Upgrades
- 1.4K Products and Accessories
- 411 Service/Maintenance & Recall Notices
- 37 Solo Travelers Hints & Tips
- 1 T@G Forum
- 75 Teardrop Groups & Links
- 78 Testimonials
- 918 Tips & Tricks
- 1.5K Trailer & Towing
- 27 Owners Manuals/PDF Files/Videos & Resources
- 55 üCamp Rally - News & Information