Removing and replacing batteries--advice needed

Looking for some advice regarding the replacement of the original AGM batteries in our 2019 400 BDL. We're replacing the Harris batteries with a new set of 6V AGMs from US Battery. I know that I have to remove the bed platform and the battery box in order to access the batteries. I will have the battery disconnect switch turned off so that the batteries are not connected to any loads, and I plan to remove them after dark so that the solar panels are not yielding any voltage.
What I need to know is: Is there any special procedure, or sequence, for removing the wiring from the existing batteries, and then reconnecting when the new ones are set in place? I'm still not as well-versed in 12V systems as I'd like to be, and I don't want to do anything that may cause arcing or any other sort of damage, either to the new batteries or to any of the wiring or other components.
Any wisdom will be appreciated.
2019 T@B 400 BDL
2025 Ford F-150
Comments
-
@FriendsofMario We also have a 2019 400 and we changed out the AGMs as well. You have to remove that battery box and that is a pain. The bed panel on the passenger side also needs to come up. When you have access you should disconnect the negative terminal first for safety and of course keep the positive and negative wires away from each other and any grounds.
Those AGMs are heavy and the new AGMs will be very heavy. If not able to lift out then one member laid them on their side and slid them out the passenger access door. Dropping the new ones in is just lining up and reconnecting positive first and finishing with the negative. The existing cables should fit the new AGMS just make sure you put them in series (+ to -) so that you have 12 V where your connect to the trailer cables. That is the limit of my electrical expertise so others may have some better ideas.
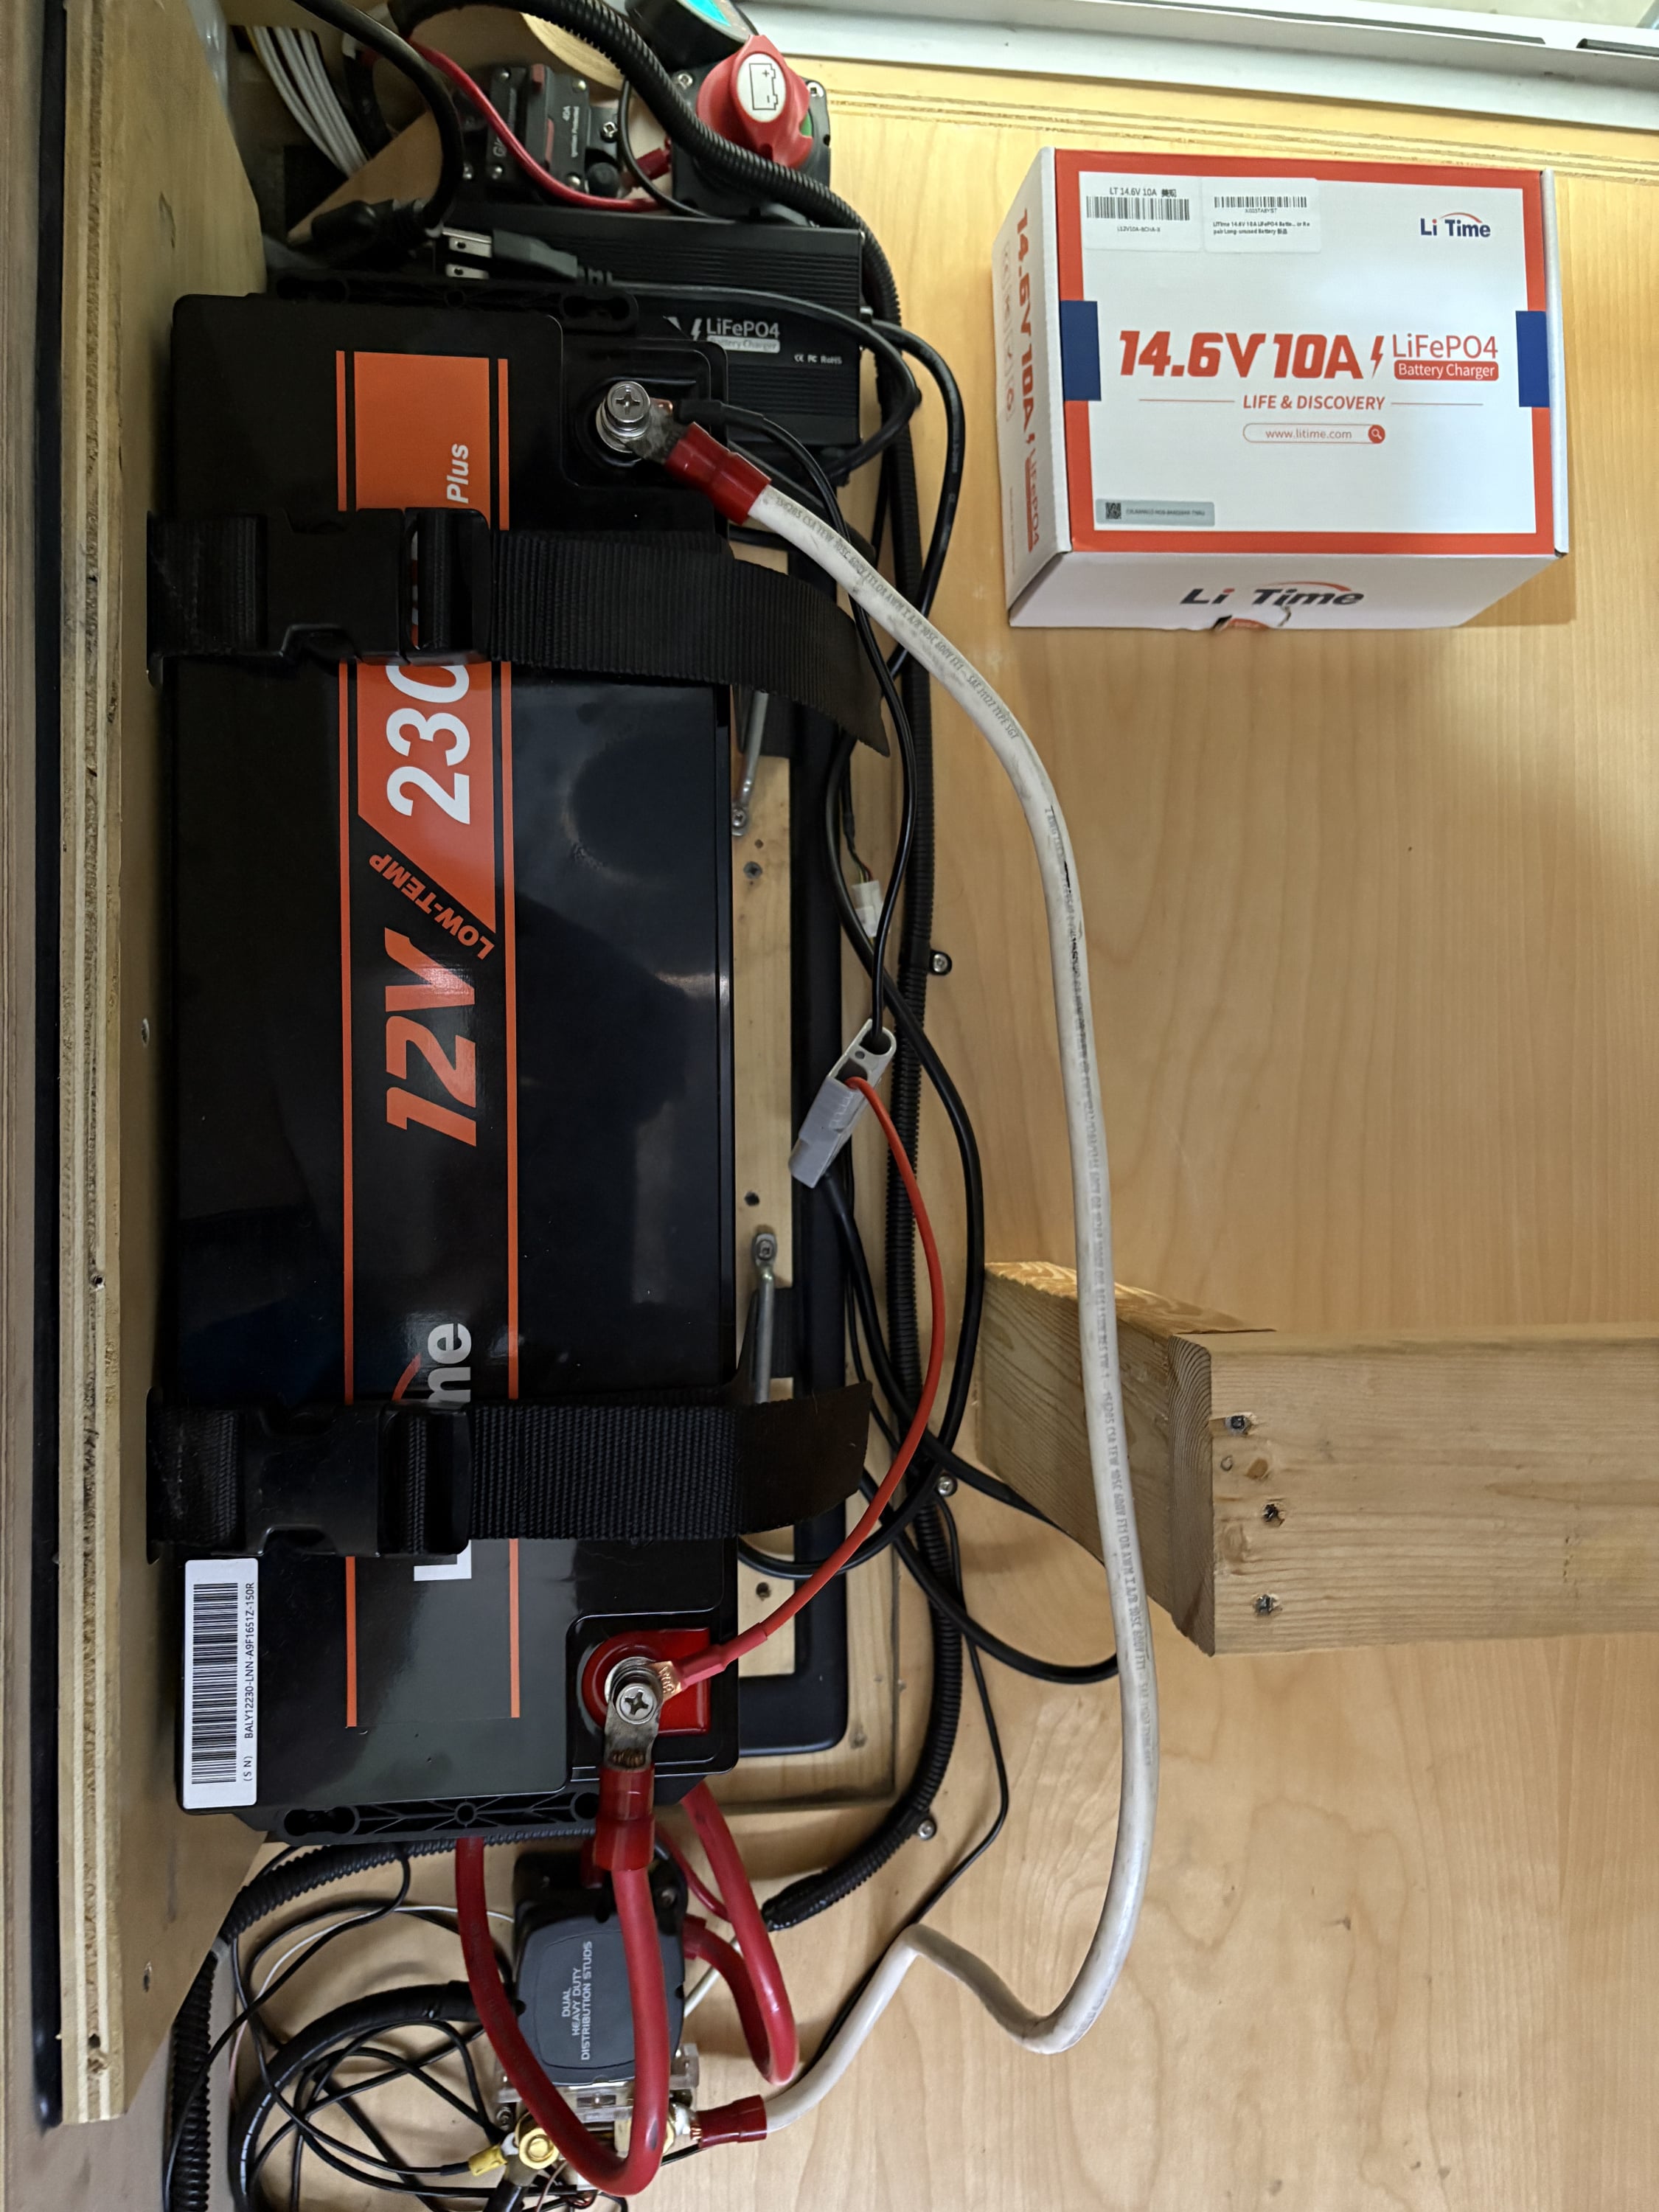
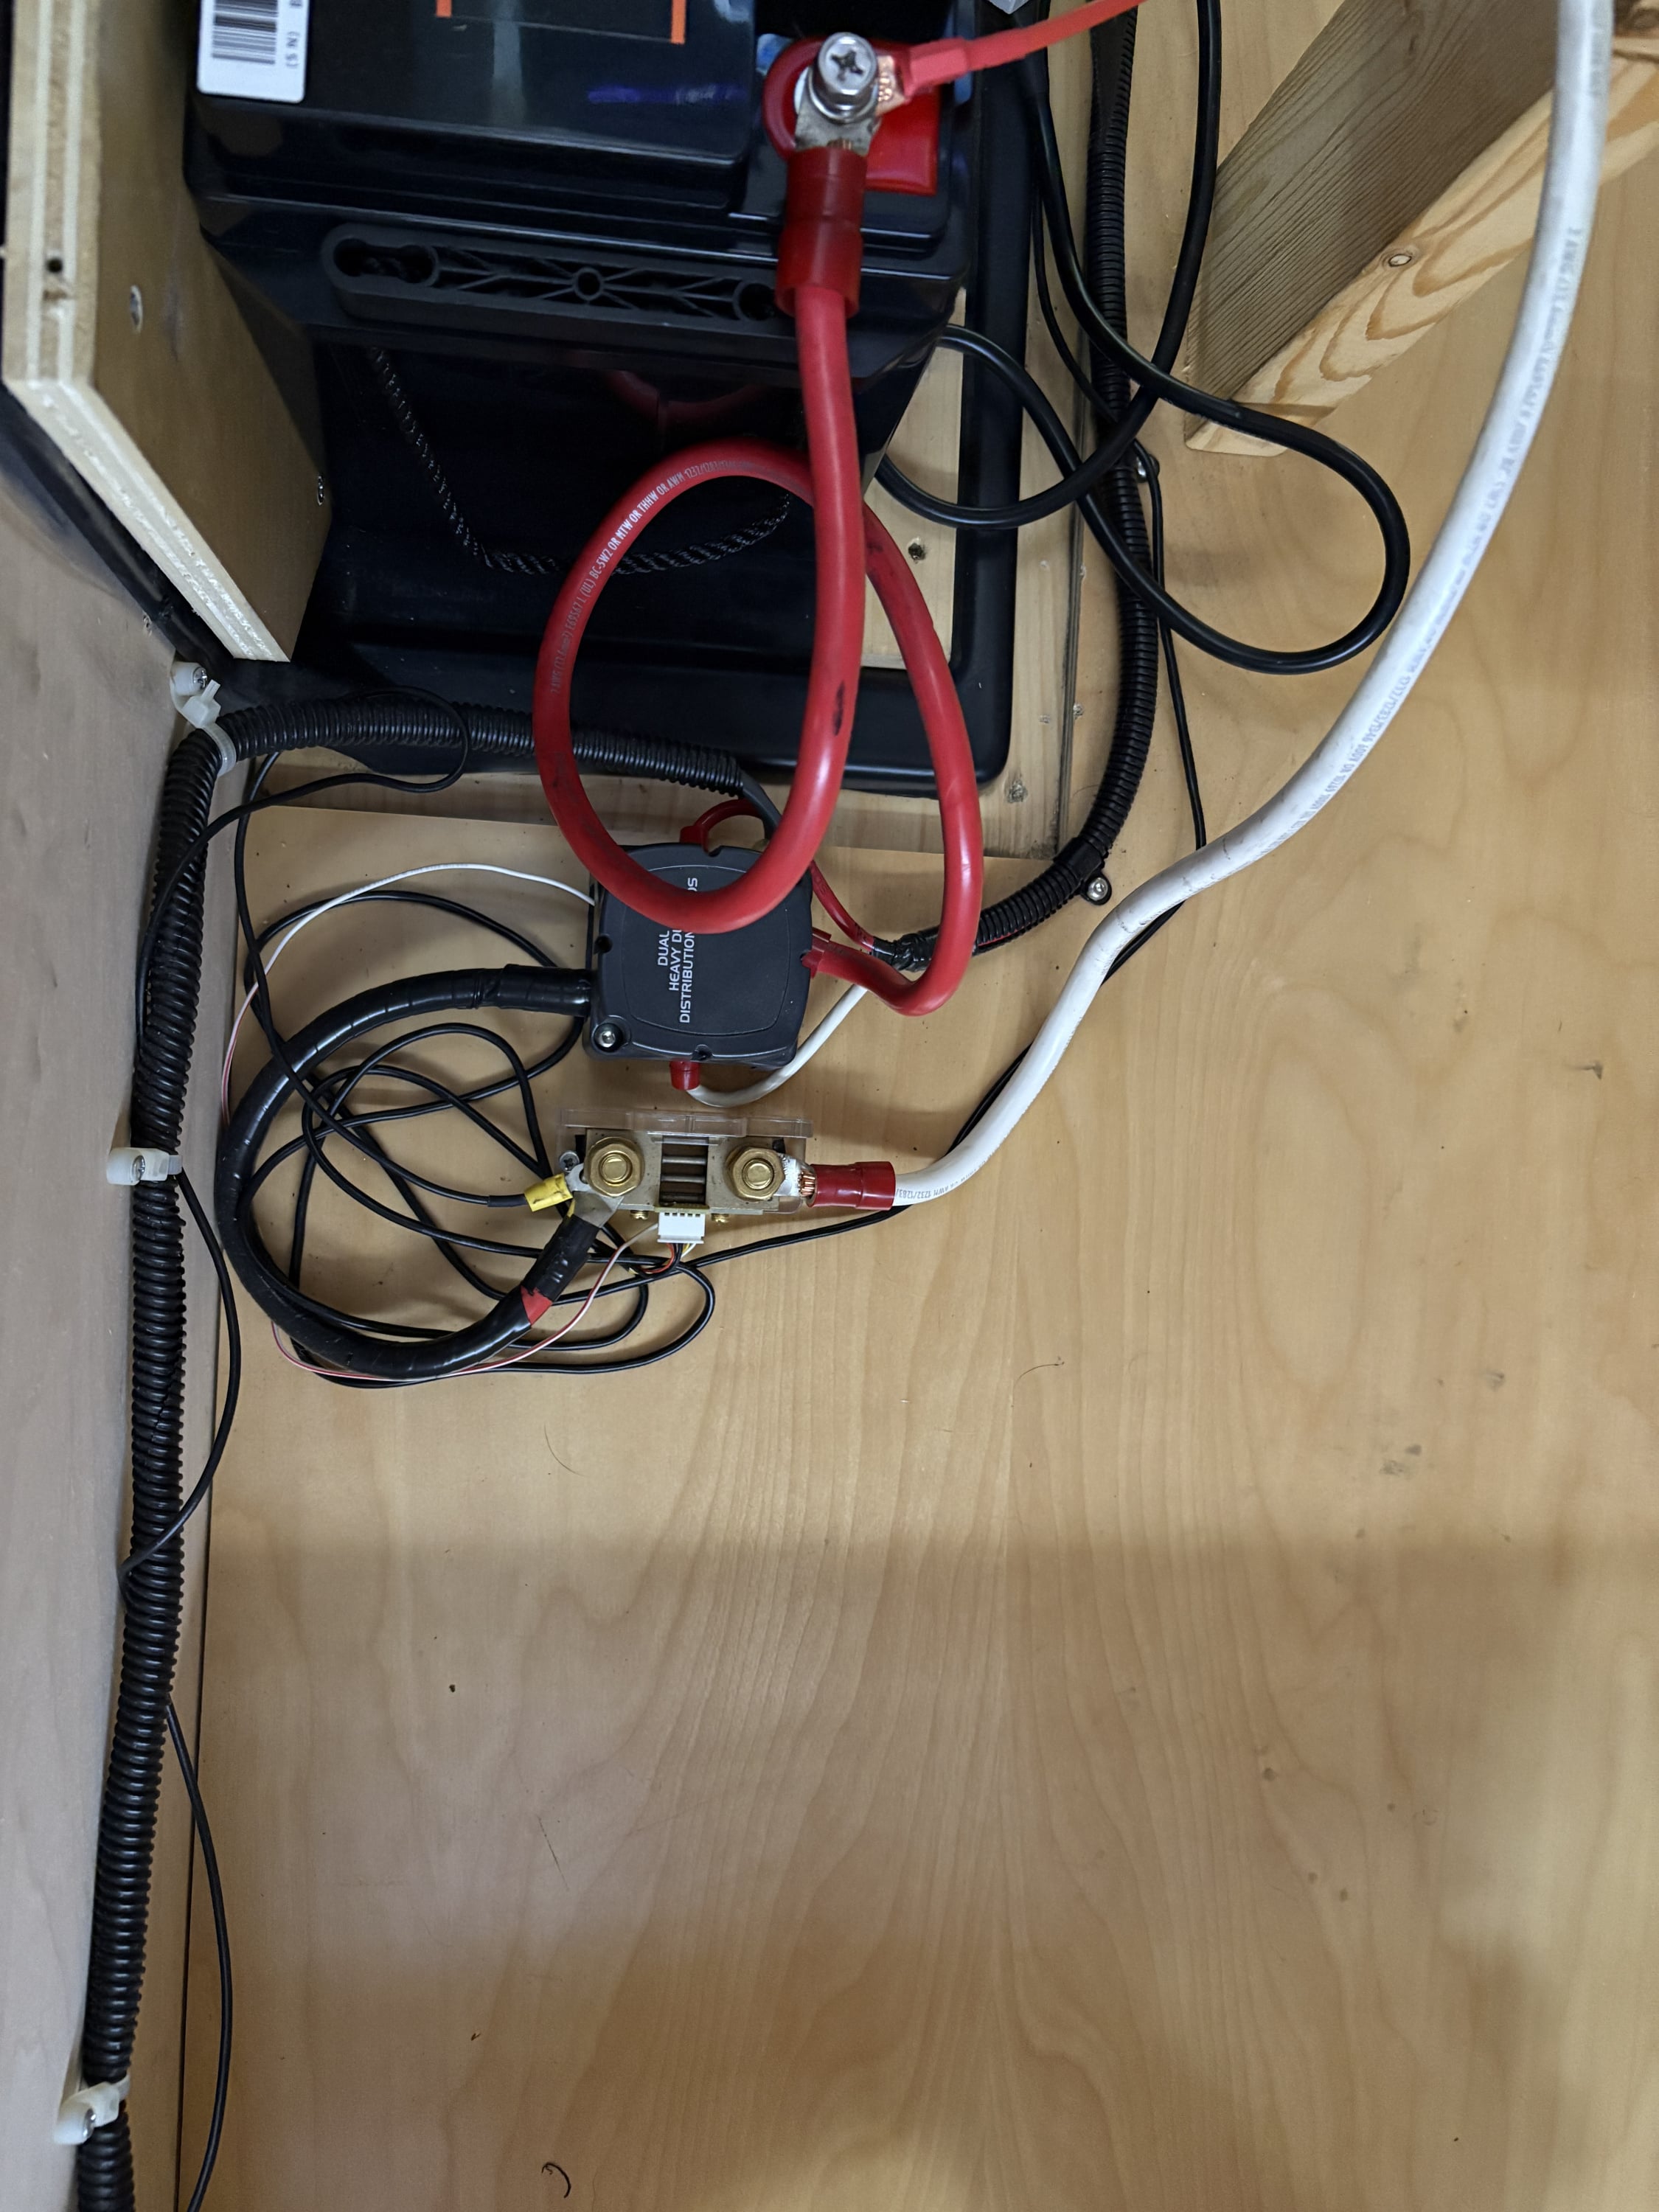
Having said that I would want you to consider a lithium replacement if you have not already. Price not significantly more and capacity and life much longer, plus nearly 90 lbs lighter. You can get a 230 Ah or a mini 300 Ah now. We love our 230 Ah LiTime and it was nearly a perfect fit with some left over.
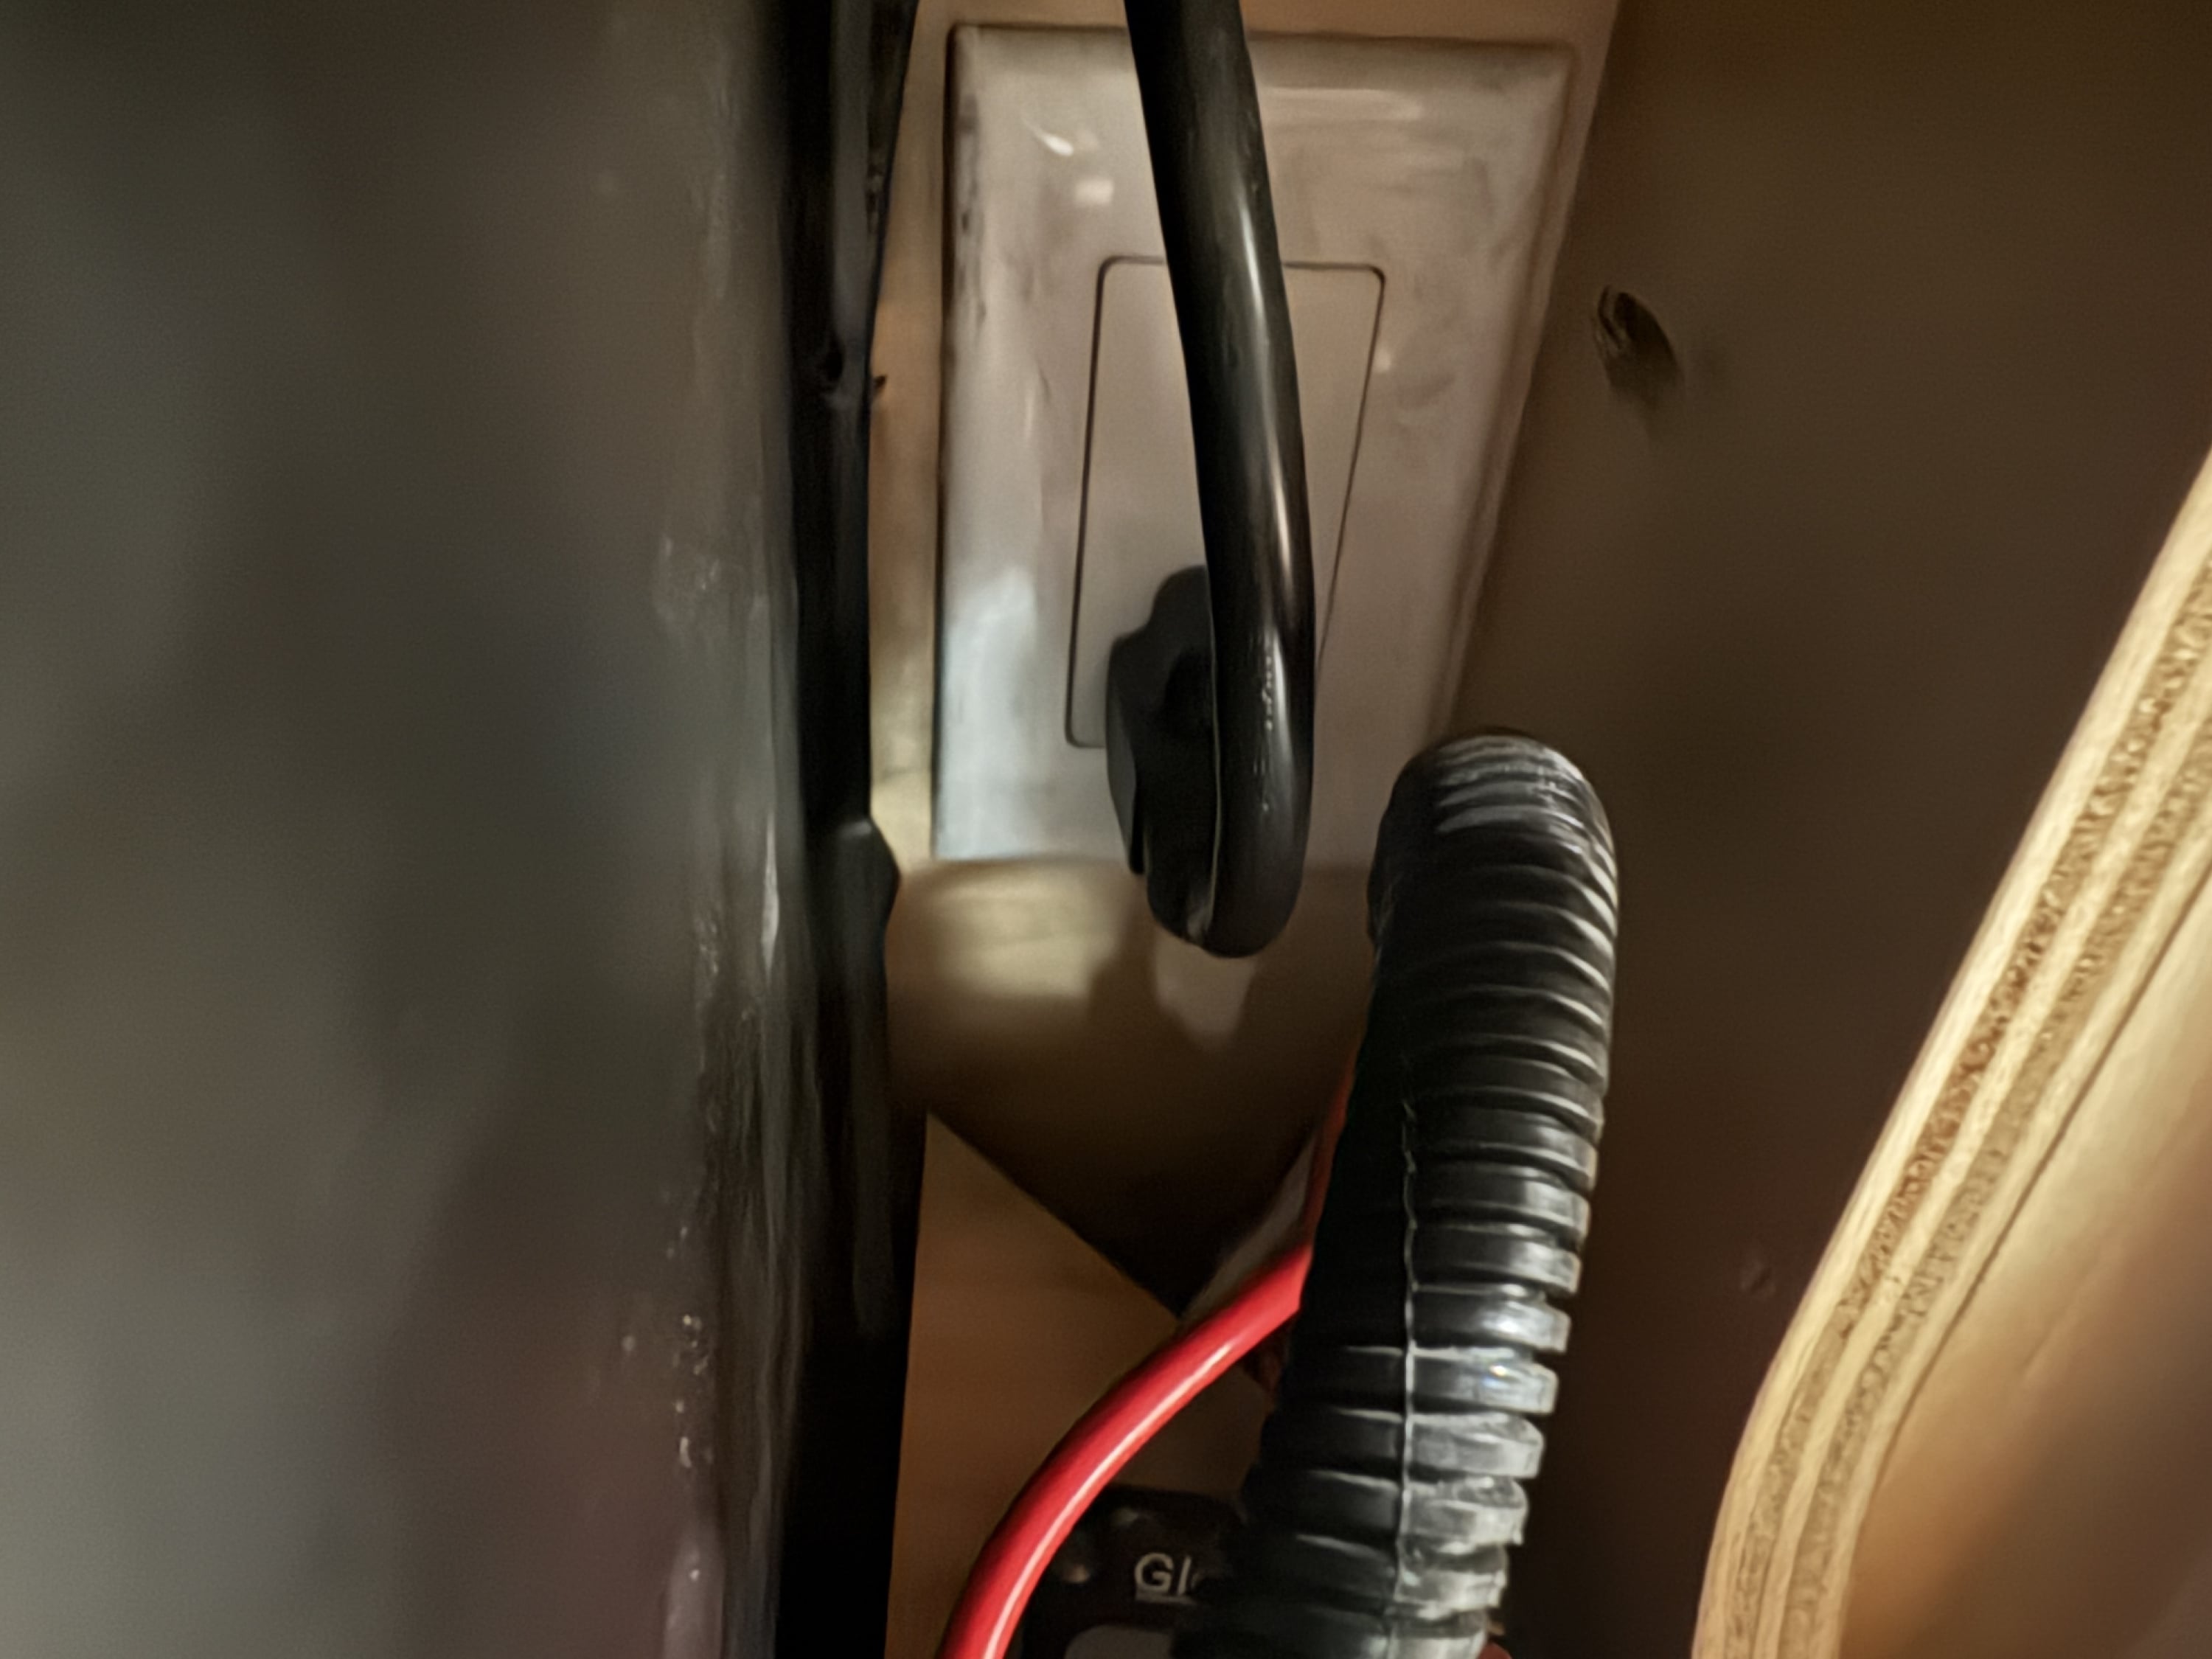
And if you have the smaller frig you may gain a 20A plug tucked away near the battery disconnect. We use that for the small Lithium charger when on shore power.
Good luck
2019 T@B 400 Boondock Lite towed by 2016 5.7L Toyota Tundra
0 -
Thanks, @qhumberd. Just the sort of info I was after. Much appreciated.
I assume I'll follow the same pattern with the cable that goes between batteries: disconnect the + first, then the -.
We've decided to stick with AGMs for two reasons. 1.) Our WFCO converter is not compatible with lithium batteries. We are blessed to have a really good nuCamp dealer near us. The service manager there showed us how to check the converter for lithium compatibility, and ours isn't. So, we don't want to incur the additional cost of changing out our converter. 2.) The two new AGMs are going to cost about $300 less than the average lithium battery, at least as far as I've researched to this point.
Yes, the weight of AGMs is a drawback, but the new ones have better specs than the OEM Harris batteries, and only weigh 3lbs. more apiece.
Now, ready for a laugh? We looked at a Trojan battery, excellent performance ratings, USA-made, etc. The only slight downside was that each battery weighed 89lbs! 😨😂
2019 T@B 400 BDL
2025 Ford F-150
0 -
Always disconnect the negative first, then the positive. When connecting, connect negative last. This eliminates the risk of shorting the battery when disconnecting the positive terminal. More an issue with vehicles that have metal bodies near the positive terminal.
Rich2019 T@b 400
2025 Toyota Highlander 2.4L TurboBellingham WA0 -
The "non-lithium" converters continue to confuse people. The "non-lithium" converter will charge a lithium battery, but "only" to around 85 percent. Most owners simply skip dealing with the converter swap, and use either solar or the many options for using a "stand alone" lithium charger that is much more dependable than even a "lithium converter" from WFCO. (The Auto Detect versions also seem to Auto Forget). Solar is perfectly capable of charging a lithium battery "completely".
But, enjoy your new batteries. Some pictures of your battery area and the big box removal would be very interesting to see!
2017 Outback
Towed by 2014 Touareg TDi1 -
@FriendsofMario just take your time and a couple of pictures before you start. It helps those of us that can't seem to remember what they just saw…
And I have to mention that once you remove the battery cover, you may be ready to NOT stand on your head and seal it back up again. It is a really tight spot in our 2019 stuck over in the corner. Just take your time.
I am not very limber at my age and once that cover was out, I was inclined to research options that did not require it to be replaced. That was when I made the jump to lithium. And honestly I do not regret it.
2019 T@B 400 Boondock Lite towed by 2016 5.7L Toyota Tundra
1 -
ready to NOT stand on your head
Ouch…yes, removing that box with that big battery combines the worst of Tab Yoga and Tab Weightlifting!
Towed by 2014 Touareg TDi0 -
I can't wait…..
2019 T@B 400 BDL
2025 Ford F-150
0 -
We have a t@b 400 2019 with original 6 v agm and also considering to go to a Lithium alternative? We changed out our converter to the WFCO lithium auto detect, but have questions about the tow vehicle change and my old ZAMP 80 watt controller?? Have a Toyota 2016 Tacoma ? Has anyone gotten a DC to DC charger?? Has anyone charged out their solar controller?? Thank you guys for your great posts.
0 -
For our 2019 400 once I found the AGMs were losing capacity so that we could not be off shore power for 3 nites running the 12 V frig, I started looking at alternatives. There are a LOT of choices now and when I last looked the price difference is really not that great unless you get what I will call an "influencer lithium". The orginal dual 6V AGMs Harris batteries had a 224 Ah rating, and you were advised to only draw it down to 50%. I swapped for a LiTime 230 Ah with low temp protection and found it was nearly a perfect fit in the space with a little space left over on the end.
I can draw this one down to 20% over and over again with no concerns. It was very easy to lift into place and secure. I did NOT have to wrestle with the battery cover, and I discovered an extra 120V plug on a 20 amp circuit near the hatch that is used for the 12 V frig normally when on shore power. I used a splitter on that to make a tap for my small Lithium battery charger that I plug in when home to top off the battery. I did not change out the WFCO. My trailer did not have solar but is wired for a solar suitcase so that in the event I need to charge to 100% when off grid that solar controller has a lithium setting and can do the job. Zero problems with the setup. Wish I had done it sooner. My 2 cents.
2019 T@B 400 Boondock Lite towed by 2016 5.7L Toyota Tundra
1 -
"Influencer lithium!". Perfect!
There are hundreds of posts now about adding a lithium battery to a 400. Like qhumbert said, it is a fairly easy drop in replacement. What ever you do decide to add, just note the size of the battery and the battery space you want to drop it into. The LiTime 230 amp hour battery has been installed many times into a 400, so if you go with a different brand or amp hour size, you can use the LiTime as a measurement "template".
Here is a search for LiTime installs in a 400.
(The search is from "Brave" browser, which actually provides a good set of images from the Forum that can show a bunch of useful photos instead of a wall of links. Clicking the photos will get you access to the thread the photo was added. This is the way the web is supposed to work!)
We will argue forever about changing out the WFCO inverters for "shore power charging" when there are so many options to do that job inexpensively.
You have the Zamp solar panels and the controller? The controller "might be" configurable for lithium solar charging, so grab the manual. If it is an "80 watt" panel, that "might be" a big smaller than you might need for recharging a larger battery setup. But: if your power needs are small, and you don't anticipate using "more amp hours" than you ever did before, then a larger panel might not be necessary.
The same thing goes for the "DC-DC" charger. It is nice if you use a lot of power and "I really need to charge the battery when I am running down the road" for whatever reason. I can see where a "heavy power user" uses a lot of battery power overnight or over a couple of lousy solar days, and really needs to charge the battery. So, think about how you camp, and if your power consumption is going to change. The upgrade to a 230 (or more!) amp hour setup is going to practically double your "usable" power, and of course, the "cushion" you will have for reserve power.
Towed by 2014 Touareg TDi0 -
In my experience the Zamp controllers are not configurable to Li batteries. However, you can still use it and understand that it will only charge up to about 80% capacity.
One concern with adding a DC DC charger on the Tacoma is the voltage drop between the Tacoma battery and the Tab battery causing issues with the charger as the current ramps up. You need bigger wires in the Tab and the Tacoma, and a separate connector between the two, to make it work reliably.Rich2019 T@b 400
2025 Toyota Highlander 2.4L TurboBellingham WA0 -
UPDATE: Project completed.
This turned out to be rather less difficult than I had anticipated. Here are the steps I took after removing all of the bedding:
- Remove the center and then the passenger-side bed platforms. Simply unscrew the hinges and lift off. This is also a good time to lift up the driver's-side bed platform and remove the fuse from the solar array. This 30A fuse is located just below the solar controller which is mounted on the bulkhead next to the 120V outlet for the ALDE.
- On our 400, the final 12" or so of the kitchen counter is hinged (I don't know if this is the case for all 2019s or not). I simply unscrewed the hinges from the cabinet and removed the drop-down piece. This proved to be the key to the whole r/r job. With the portion of the countertop that is directly above the battery box out of the way, I could then both work on the battery box and remove/replace the batteries from directly above. Here's what you'll see:
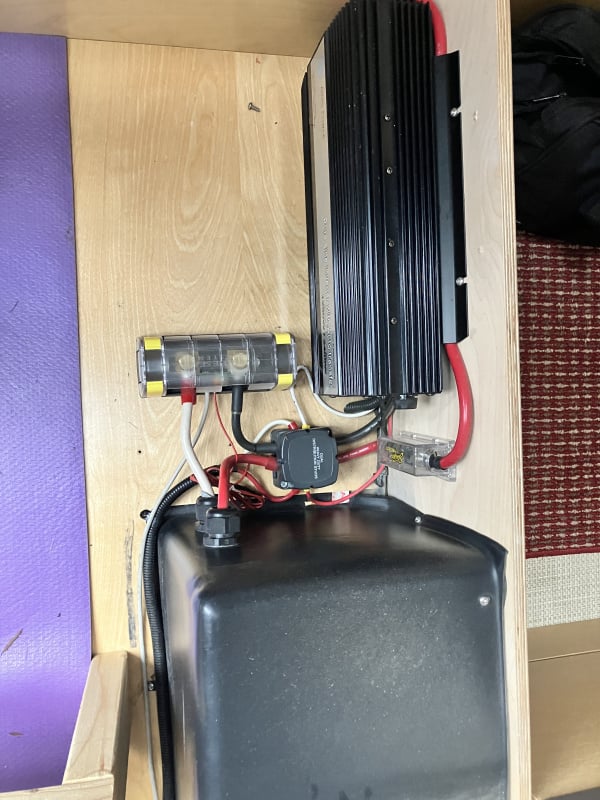
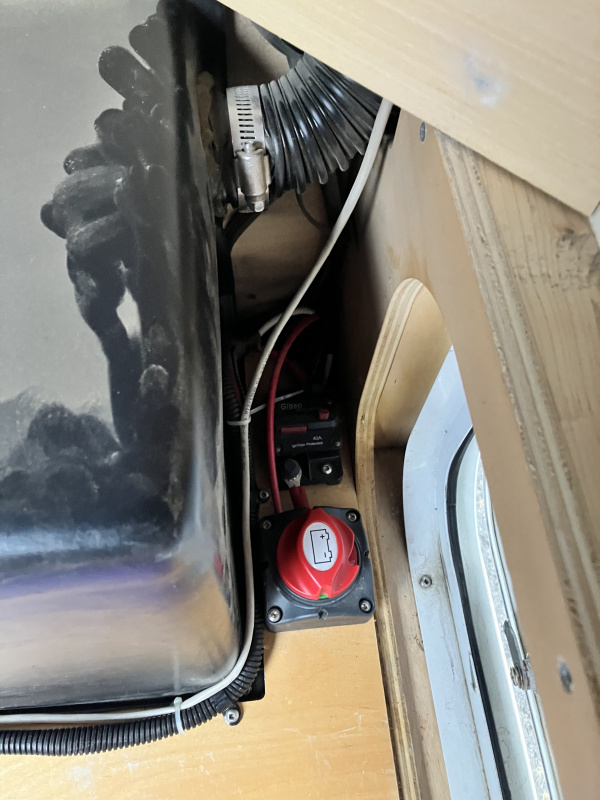
4. Next remove the battery box. This is the most time-consuming part of the job. There are 4 screws along the top edge of the box (they screw into the bulkhead of the bed platform), one on each vertical side of the box, and then a total of 8 (I think) around the perimeter of the box where it meets the floor. Note: along the front edge of the box there are screws which hold the flexible black plastic conduit to the floor, and then there are screws at each corner which attach the actual battery box to the floor. Additionally, there is a scew right next to the circuit breaker that sits just behind the battery disconnect switch. Make sure to remove those three screws…
Also you'll see the corrugated plastic tubing for the vent (right side of above photo). Take the hose clamp as loose as you can, work it free of its deathgrip on the battery box, and slide it out of the way. Pull the vent tubing loose; I had to wiggle it back and forth vigorously several times until I was able to pull it off: I then let it just hang down straight out of the way.
5. On the left side of the battery box you'll see where the battery cables penetrate the box and out to the terminal block. These cables pass through liquid-tight connectors. Loosen both of those and slide them out of the way. Doing this will allow you to rotate the battery box when you finally pull it loose in the next step.
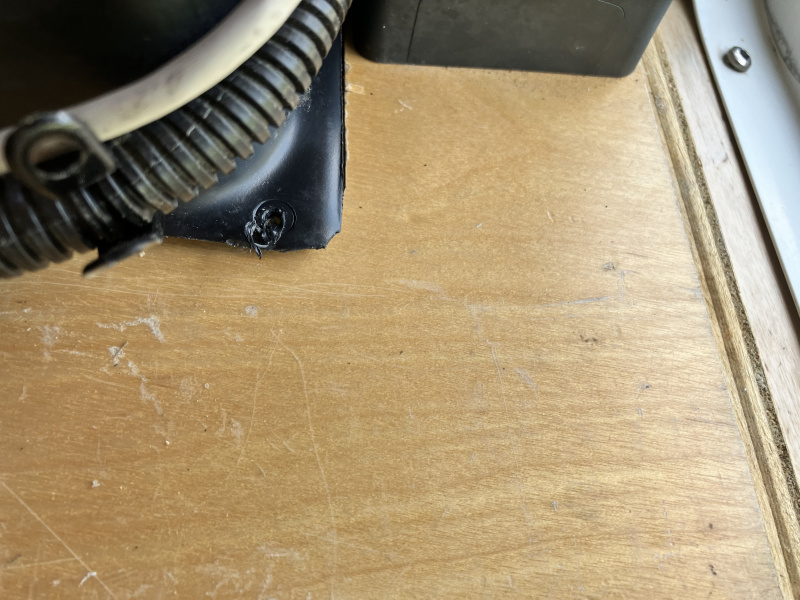
6. The right front corner of the battery box, where it meets the floor, is actually tucked under the floor where it is cut out to accomodate the box. Push against the lower right front corner of the box to get that edge to pop out. (See photo below.) The upper right corner, meanwhile, is tucked up behind the edge of the wall that's under the aforementioned hinged countertop dropdown. Push down on the upper right corner of the box, hard, while pulling outward at the same time, so that that edge comes free.
7. Now you can pull and lift the box outward, and rotate it up and out of your way. You'll be looking at your old, factory-installed AGM batteries:
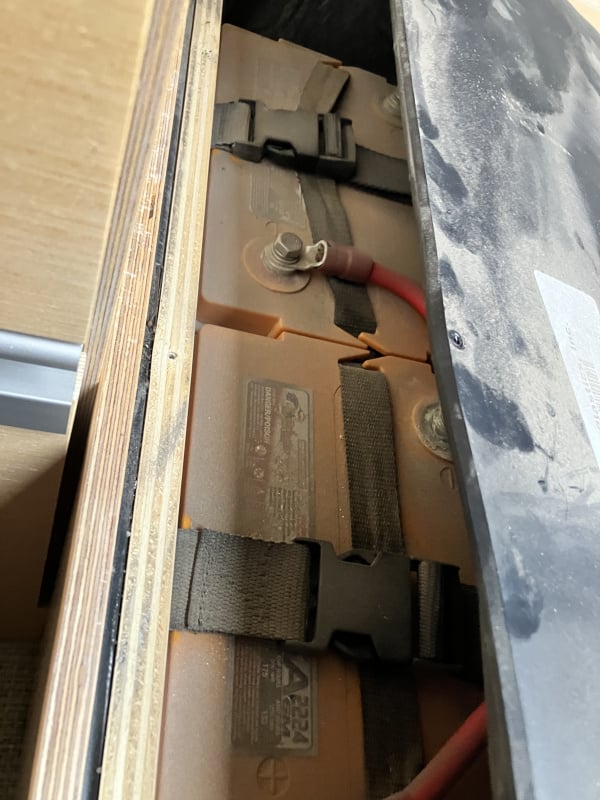
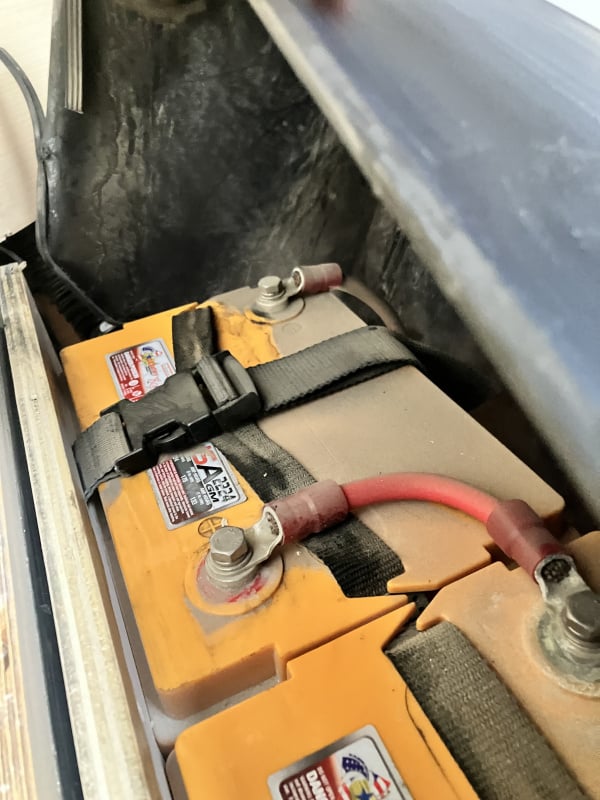
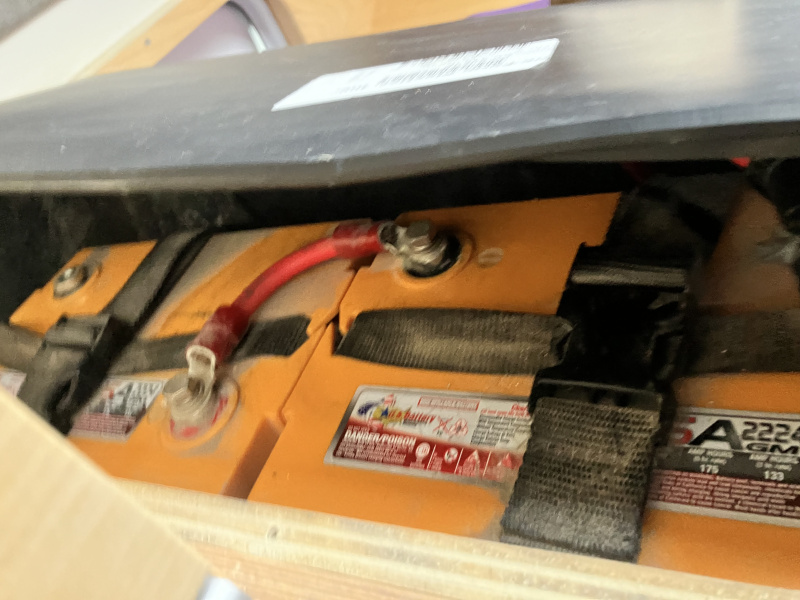
Surprise! Not two Harris HBDAGMGC6-A, as we expected, but two USBattery 2224s. But that's fine, because we went with an exact, drop-in replacement. Note all of the dust and dirt in the battery compartment and the underside of the battery box itself. Some of it is dust and dirt, but I believe that a lot of it is electrolyte that boiled up, escaped, and resolidified. The positive terminal of the near-side battery was pretty corroded, and once I had the batteries out, I saw that the leading edge of both cases showed a consistenly thick, even covering of the same material.
8. Take off the batteries' seatbelts, disconnect the positive cable on the near-side battery, disconnect the jumper between the two batteries, and finally disconnect the negative cable from the far-side battery. Pull each one straight up and out.
The rest of the job consists of reversing these steps. Here's what everything looks like cleaned up:
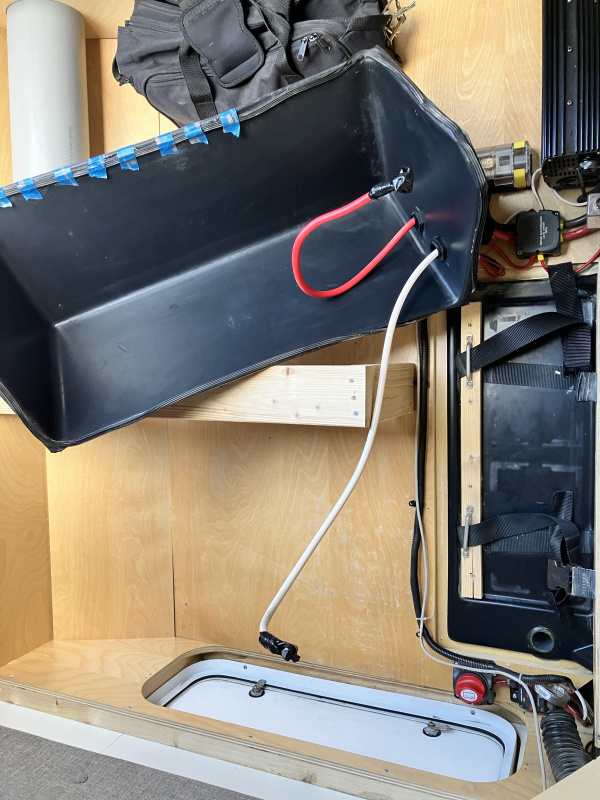
The pieces of blue painter's tape are acting as gravity mitigation devices. The battery box is gasketed around its perimeter, and a long section of this had come loose. I used Lexel silicone adhesive to persuade it that it wanted to remain where it should be. And finally, the new batteries in their new home:
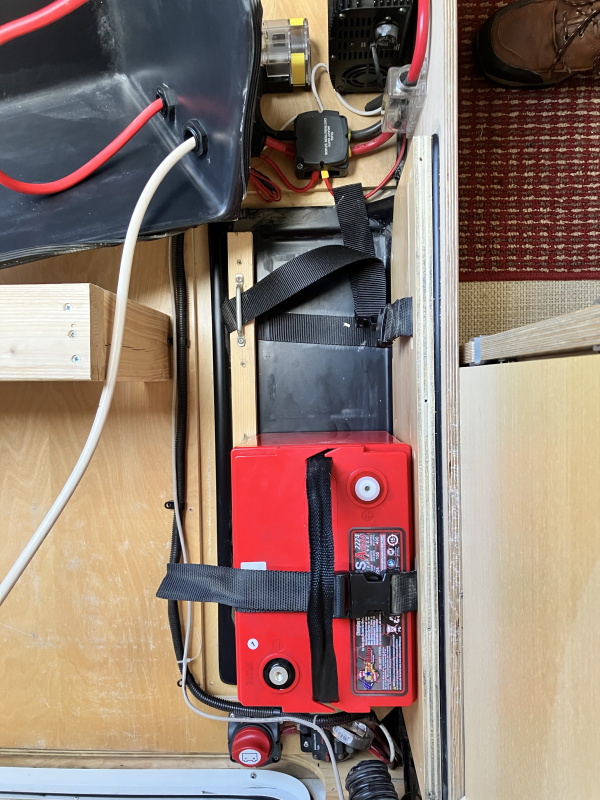
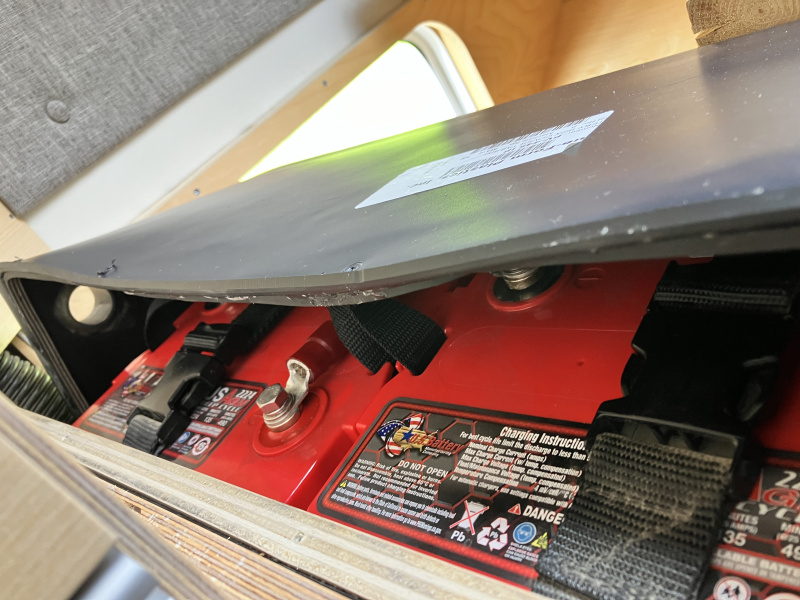
While I had the batteries out I took the opportunity to tighten all of the terminals on the shunt and terminal block.
I know that most people (including those who replied to this initial post) are going to switch out their AGMs for lithium; but, hopefully this information as to how to remove the old batteries can be of help to anyone who is contemplating either making an AGM replacement, or preparing to install lithium.
2019 T@B 400 BDL
2025 Ford F-150
0



 2017 Outback
Categories
- All Categories
- 12 Cirrus Truck Campers
- 128 Dutchman and Vintage TaB Archives
- 3 Forum Rules
- 3 nüCamp & Forum Contacts
- 969 Air Conditioning & Refrigeration
- 2.7K Battery/Electrical & Solar
- 1.2K Camping & Travel
- 145 Events & News
- 220 Factory Comments
- 27 "FOR SALE" - New/Used Trailers
- 15 “FOR SALE" - Camping & Trailer Gear
- 2.4K Heating/Plumbing & Winterizing
- 138 Help - Computer & System
- 925 Introductions
- 408 Looking to purchase a trailer?
- 2.2K Modifications & Upgrades
- 1.4K Products and Accessories
- 424 Service/Maintenance & Recall Notices
- 37 Solo Travelers Hints & Tips
- 1 T@G Forum
- 78 Teardrop Groups & Links
- 78 Testimonials
- 922 Tips & Tricks
- 1.5K Trailer & Towing
- 27 Owners Manuals/PDF Files/Videos & Resources
- 56 üCamp Rally - News & Information