Categories
- All Categories
- 6 Cirrus Truck Campers
- 115 Dutchman and Vintage TaB Archives
- 5 Forum Rules
- 3 nüCamp & Forum Contacts
- 942 Air Conditioning & Refrigeration
- 2.6K Battery/Electrical & Solar
- 1.2K Camping & Travel
- 142 Events & News
- 219 Factory Comments
- 12 "FOR SALE" - New/Used Trailers
- 10 “FOR SALE" - Camping & Trailer Gear
- 2.3K Heating/Plumbing & Winterizing
- 133 Help - Computer & System
- 912 Introductions
- 406 Looking to purchase a trailer?
- 2.1K Modifications & Upgrades
- 1.4K Products and Accessories
- 393 Service/Maintenance & Recall Notices
- 37 Solo Travelers Hints & Tips
- 1 T@G Forum
- 71 Teardrop Groups & Links
- 72 Testimonials
- 909 Tips & Tricks
- 1.5K Trailer & Towing
- 27 Owners Manuals/PDF Files/Videos & Resources
- 62 üCamp Rally - News & Information
DM T@b - I installed Al-Ko shocks
 mdomb529
Member Posts: 39
TL;DR: Yesterday, I completed the Al-Ko shock install on my 2006 DM T@b. I ordered the shocks from TrailerTek in the UK. This is a job I think anybody can perform as long as they have the necessary (but basic) tools and provided they can get down onto the ground, slide/shimmy under (and hopefully out-from-under) the T@b, and get back up again. Once all the tools and parts are gathered, I estimate this job will take 30-45 minutes (or for those of you on the metric system, 30-45 minutes). The purpose of this post is not really to provide a how-to, it's to convey that this is a simple enough job and is within reach of most people who would be interested in doing it. Let me know any comments or questions!
Ordering: For the DM T@b, you need the green Al-Ko shock absorber kit (sometimes called "octagon" shocks), including 4 metal brackets. I got them for about $150 US, with shipping. Because of COVID-19, they took a little extra time to deliver from the UK to Wisconsin (United States). When they arrived, they were missing one of the 12M nylock nuts, which I was able to pick up at my local hardware store for $1.50.
Tools: Socket/wrench in 19mm or 3/4 inch size; second wrench of same size or crescent wrench; flathead screw driver; pliers; swear jar.
My procedure:
- Using the built-in front jack/jockey wheel, crank the nose of the camper as high as you safely can.
- Slide under the camper in front of one of the wheels. Using flathead screwdriver, pry the plastic/rubber rectangular cap from the bottom of the swing arm on which the wheel is mounted. I had more success prying from the side of the cap toward the back of the camper. Here's a close-up picture of the cap in the swing arm (Note: Your swing arm may have fewer spider webs and dead bugs).
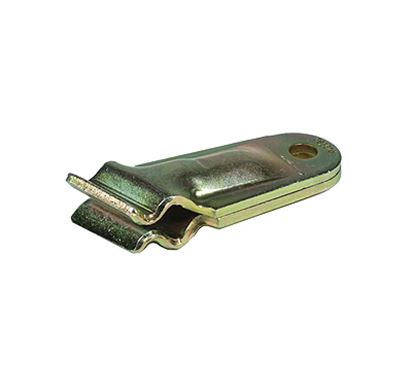
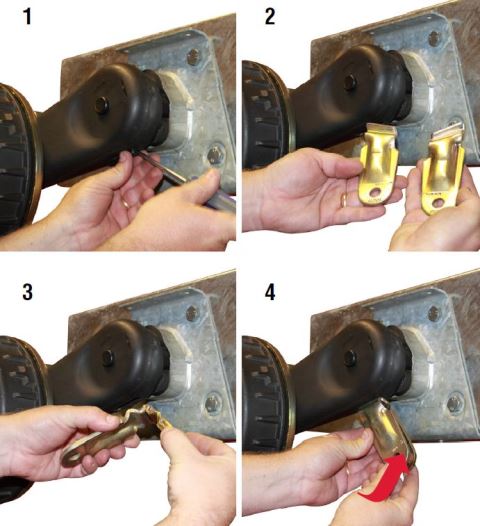
- The metal brackets insert into the slot (created by removal of the plastic cap) as shown in the following photo, which I borrowed from the web. Note that the brackets will not, once inserted into the slot, lay flat against each other (see the red arrow in the fourth step below) until the bolt is fully tightened.


- Then you pretty much bolt the shocks into the pre-existing hole (in the frame) and the newly installed bracket. There are three holes to choose from in the frame; my understanding from random comments elsewhere (I couldn't find specific instructions for the T@b) is that the middle hole is the appropriate one.
- The upper bolt (in the frame) may be partially obstructed by another bolt on the backside, but I had just enough room for it to fit. See picture below.
- Repeat this process for the other wheel.
- Here are some additional resources I found helpful: (a) Instructional video (not specific to the T@b); (b) What is the purpose of shocks?
Matt
Appleton, Wisconsin
2006 Dutchmen T@B ("Fuego")
TV: 2007 Nissan Pathfinder
Appleton, Wisconsin
2006 Dutchmen T@B ("Fuego")
TV: 2007 Nissan Pathfinder


Comments
T@BMahal
'04 #100
The last forest service road I went up was quite bouncy and I found a lot of items moved in the trailer. I'd consider this if it reduces stress/strain on the trailer!
Sm@ll World: 2021 320S Boondock, 6V Pb-acid
Shunt, Roof & Remote solar & 30A DC-DC Chargers
managed by VE Smart Network
cheers
MOUSE-KE-T@B
2007 Dutchmen T@B Clamshell #2741
2022 nuCamp T@B 320 CS-S
2021 F-150 502A Lariat SuperCrew, 3.5 EcoBoost 4x2
Harvest, AL
Sm@ll World: 2021 320S Boondock, 6V Pb-acid
Shunt, Roof & Remote solar & 30A DC-DC Chargers
managed by VE Smart Network