What's different in these pictures?


Comments
-
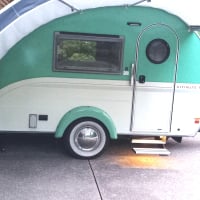
Ya - The visor is attached to the drivers side rail.
Could also be your platform with the battery box.1 -
Agree with PXL. Also, it looks like another platform on the left of the propane tub (total of two).2016 Outback 320
2024 Ford F150 Supercrew short bed.0 -
I agree with the visor on the driver's side.2016 T@B MAX S-aka: WolfT@B
TV: 2006 Chevy Avalanche LT Z71 aka: WhiteWolf, or 1972 Chevy Custom10 P/U aka: SnarlingWolf
Spokane, Wa.
Eric aka: Lone Wolf0 -
Yep, you are correct. We have the side tent for the passenger side and then we bought the visor for the drivers side for shade. I never tried it out until we were at the camp site. When I tried to put it on, I realized the rail on the drivers side does not have the opening in the rail for it to slide into ( one of those you should have tried this out at home moments). I did not find any thing on the forum about this, so I thought I would post up some info. I modified a set of locking welding pliers to bend the Keeder rail to make it look like the factory bends on the other side. see pics below. It worked great and you cannot tell it from the factory bends.
You are also correct on the battery box platform, I have designed a left and right side shelf that can be bolted anywhere along the trailer tongue, I am running dual propane tanks and needed a place for my battery. I am still working on a small diamond plate battery box that will fit a group 24 or 27 battery, should have them done soon, I have been under the weather for about 45 days and have not been able to work on it. will post up shots when I am done.


 0
0 -
I hope you are doing better. I always enjoy seeing the new things you come up with! Nice job with the keeder rail!2016 T@B MAX S-aka: WolfT@B
TV: 2006 Chevy Avalanche LT Z71 aka: WhiteWolf, or 1972 Chevy Custom10 P/U aka: SnarlingWolf
Spokane, Wa.
Eric aka: Lone Wolf0 -
Ohhhhhh! *Those* factory bends. I had no idea what you were talking about. You had to modify both top and bottom. I see now. Can't tell the factory didn't do it!! Nice about the battery box too. I replaced my strap that the dealer provided with a ratcheting one. The shortest length I could find was 12', so I had to cut some footage off. I've never trusted the buckles because I could never get them tight enough for me (could be user-error!). Great job!!2017 820R Retro Toy Hauler from 2015 Tabitha T@B from 2009 Reverse LG Teardrop (but a T@Bluver at heart)1
-
Here's some pictures of the side shelves I am working on


 0
0 -
I bought a set of these at the local hardware store because neither my top nor bottom rails on the door side had these bends to install the visor. The are made by Irwin and were labeled "Locking Sheet Metal Tool." I actually started the job by trying to use regular pliers. Don't do that. It makes a mess.
")

1 -
I was able to open up my Keder rail nice and neatly using wooden paint stir sticks to gently pry one side at a time. No nicks or gouges thanks to the comparatively soft tool. No special tool needed.
Have fun!
Bob
SUNT@B
 1
1


Categories
- All Categories
- 10 Cirrus Truck Campers
- 120 Dutchman and Vintage TaB Archives
- 3 Forum Rules
- 3 nüCamp & Forum Contacts
- 954 Air Conditioning & Refrigeration
- 2.6K Battery/Electrical & Solar
- 1.2K Camping & Travel
- 142 Events & News
- 219 Factory Comments
- 20 "FOR SALE" - New/Used Trailers
- 14 “FOR SALE" - Camping & Trailer Gear
- 2.4K Heating/Plumbing & Winterizing
- 140 Help - Computer & System
- 920 Introductions
- 407 Looking to purchase a trailer?
- 2.1K Modifications & Upgrades
- 1.4K Products and Accessories
- 408 Service/Maintenance & Recall Notices
- 37 Solo Travelers Hints & Tips
- 1 T@G Forum
- 75 Teardrop Groups & Links
- 77 Testimonials
- 916 Tips & Tricks
- 1.5K Trailer & Towing
- 27 Owners Manuals/PDF Files/Videos & Resources
- 54 üCamp Rally - News & Information