Replacing 2021 320 front window with new version

Since acquisition the front window has had a small crack at one screwhole where the side latch attaches to the plexiglass. This winter it spread and we decided to replace the plexiglass.
Tools: No.2 square drive bit; autobody plastic pry bar and scraper; 1/8" bit to undersized pre-drill; polybutylene caulk and/or tape; naptha for cleanup; rags; stepstool. blue tape and pen; rafter square and tape measure; cardboard for centerline template; magnetic dish for hardware.
Note from factory....We unfortunately no longer carry the window that came with this trailer so they will need to upgrade to our new tinted version, 320 Front tinted window part number 24426 and price $308.99 UPS 2ND Day Air Shipping estimate $48.02 Total - $357.01
Windows are non-returnable due to freight costs and the high risk of damage during transit. Window orders are processed via 2nd Day Air shipments.
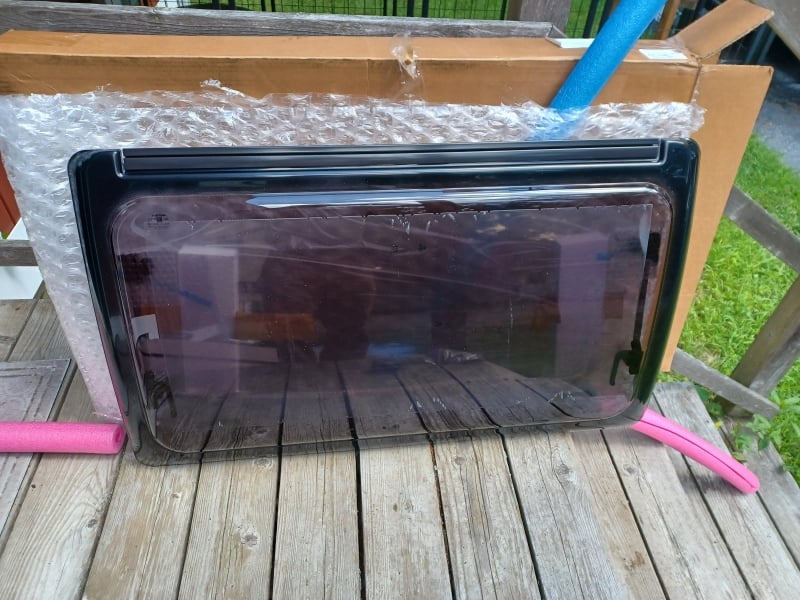
After discussion with Nucamp, ordered replacement from via Missouri Teardrop Campers. It was “in stock.” The “factory” (Nucamp) did not process the order for five weeks, without communicating that fact despite inquiries. No explanation. The window arrived nicely packaged with slotted pool noodles protecting edges, bubble wrap, and heavy box.
===================================================================
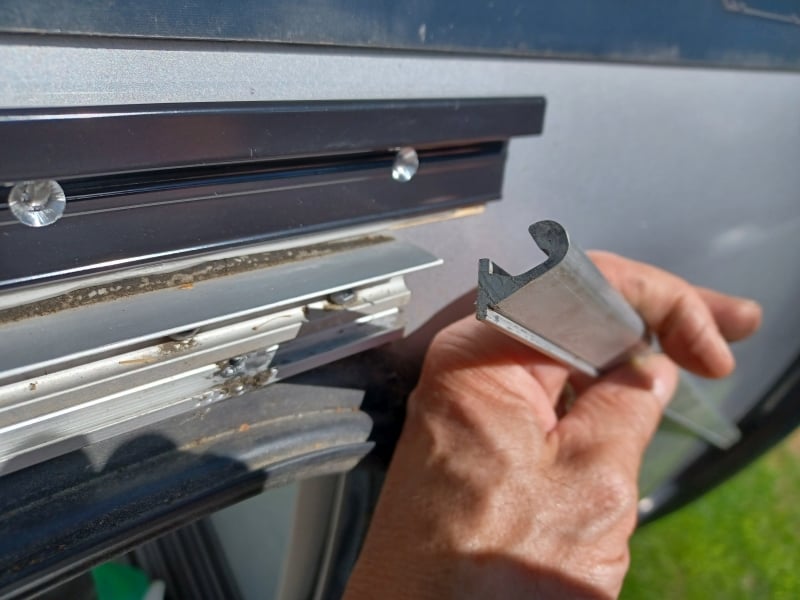
The top mounting extrusion on original and new window differ markedly.
new- one piece top aluminum extrusion into which window inserts face-on when rotated 180deg upwards, and hinges down into position. Extrusion attaches with countersunk flathead self-tappers.
pic- original two-piece below; new one-piece resting above for comparison. Not in mounting position which was ~5/8" higher than original position.
===================================================================
Removal:
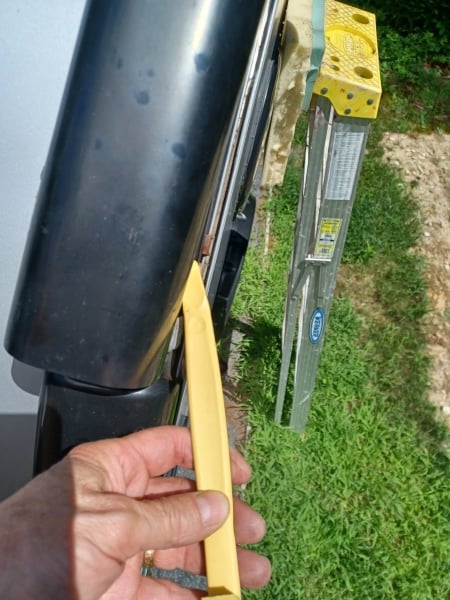
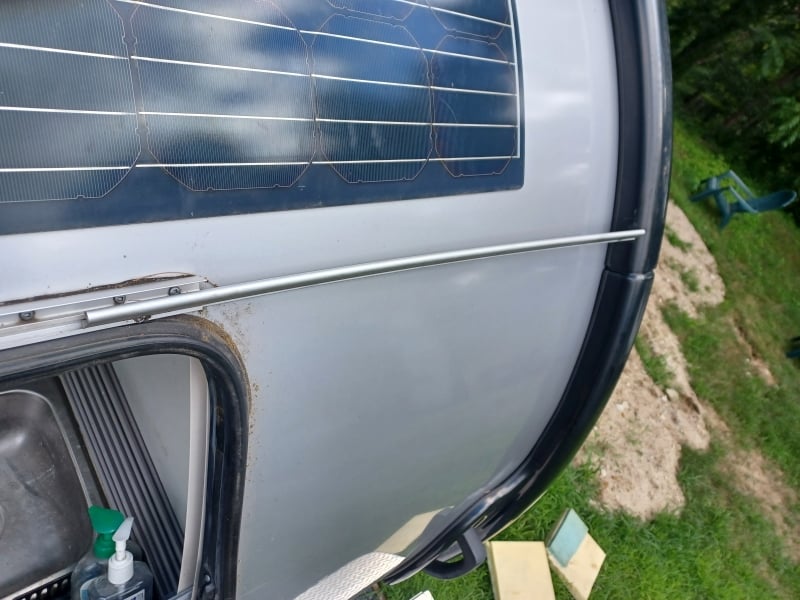
For window and extrusion removal clearance, it is necessary to loosen and lift the upper righthand portion of the black half-moon extrusions over the Tab side/roof joint. I tapped upwards to loosen from rusty clips, and lifted two inches to slide the original aluminum extrusion out.
Unscrewed clasp hardware in window opening, removed top hinge setscrew, slid plexi window off to right.
Then tapped and slid inner aluminum extrusion off to right and out.
Used plastic pry bar to remove aluminum extrusion and to scrape off adhesive caulk tape strip.
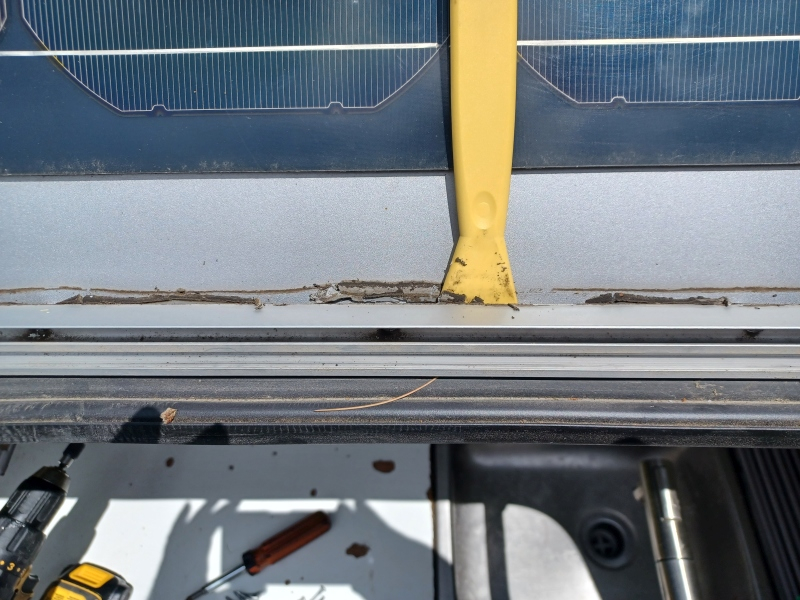
Cleaned up Tab with plastic scraper and lots of Naptha on rag, being careful to not flood the rubber seal that might have adhesive behind it.
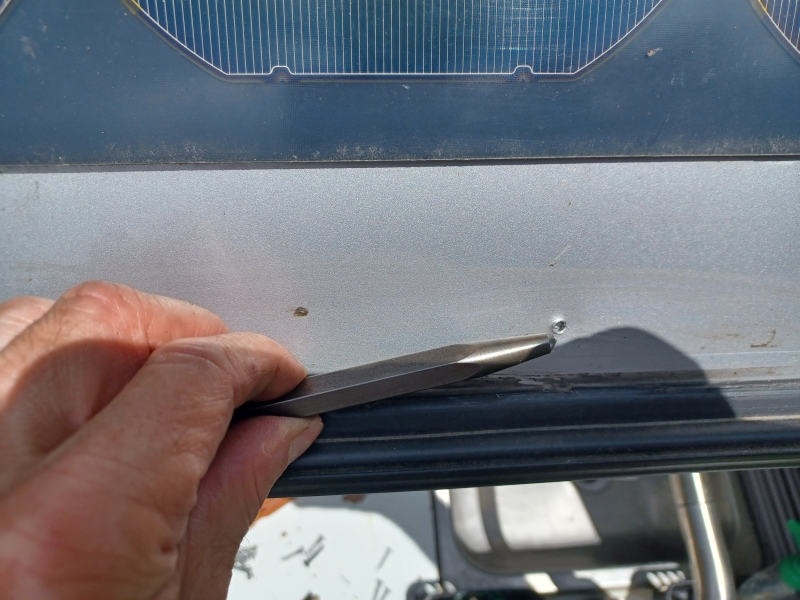
The self-drilling screws pull up and deform a ring of sheetmetal at each screwhole, which would interfere with sealing a new extrusion. Dimpled with tapered metal punch. Injected caulk to seal these screwholes in sheetmetal and foam.
===================================================================
Installation:
Nucamp mounted the original extrusion off-center by over 1/2", compromising function of clasps. I'd played around and re-drilled the hinge setscrew and I think ground part of the extrusion to shift it over into alignment. Quite a while ago. Nucamp overdrove and stripped most of the extrusion mounting screws (par). It was basically held in by the original strip of caulk/tape which retained its flexibility and adhesion.
The new extrusion has zero side play. Reusing existing screw holes left it too far off center. Lesson #1 learned being hasty in 100F heat index and literally getting burned touching hot metal and black plastic.
What I did not expect is that the vertical distance between hinge point and latch centers is greater, requiring one to mount the extrusion about 5/8” higher up on the camper. Lesson #2 learned being hasty in 100F heat index.
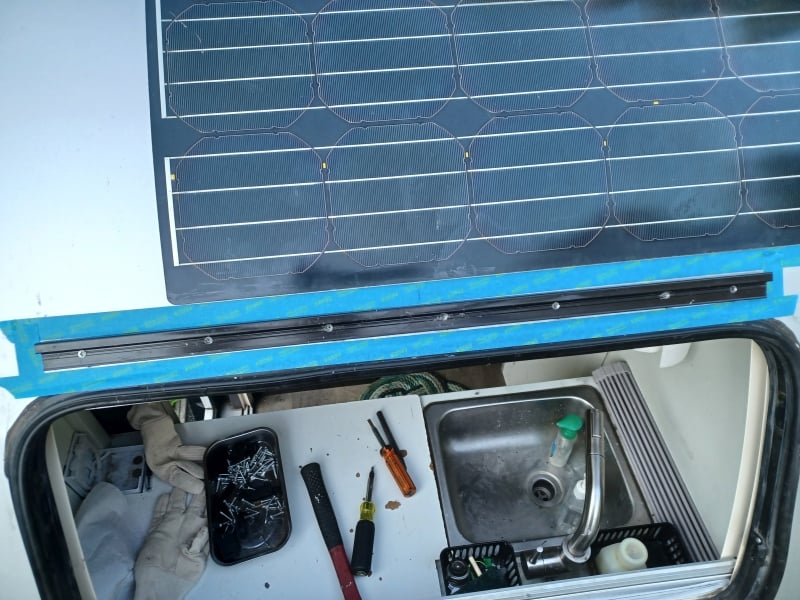
Marked centerline on new extrusion and laid out centerline of opening with great care. CRITICAL STEP done at 7 pm when the overhead furnace shut down.
Used blue painters tape for temporary marking.
Predrilled (undersize) two endholes through extrusion to TAB and fastened.
Window installs by holding vertically, overextended from normal opening position, inserting bent top into extrusion, and gently rotating window downwards whilst keeping top of window pushed vertically up into extrusion slot. It took several tries each time I did this which was iterative as I tested, adjusted, and eventually re-did the installation alignment. Stood on my front boxes and was close to over-balancing backwards in order to clear the swinging window in front of me.
Once alignment was (finally for third time) confirmed for latching, drilled balance of mounting holes, taped off perimeter of Tab around extrusion, caulked evenly spread layer (1/8” or so) of caulk on backside, and installed with provided self-tappers which I hand-set to avoid overdriving.
Ran another bead of caulk topside, finger smoothed, and removed tape. Cleaned up any gummies with Naptha and rag.
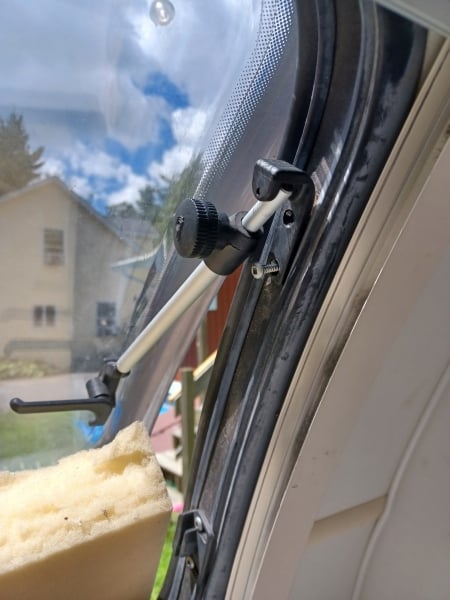
Inside, I hand-screwed the two screws to each side-support and closed and latched window.
A stack of foam scraps spaced the window away from opening so as to create space to install the pivot-mount screws.
Then carefully aligned and hand-screwed the bottom latch receivers atop pair of support spacers.
Tested physical operation, then water spray-tested for leakage. 70 mph winds may still drive some water past seals if not tight, TBD.

Two salt tablets, a very cold shower, and some hours later I feel better having replaced this window on one of the hottest days I can remember.
2021 T@B 320S Boondock/ 2012 Tacoma 4 cylinder truck / 2023 Tacoma 6 cyl. truck
Comments
-
Excellent write-up and photo support. I know a fellow T@Ber who is thinking about doing this project.2016 Outback 320
2024 Ford F150 Supercrew short bed. -
Thanks @Maxcamp!Sharon / 2017 T@B CSS / 2015 Toyota Sienna Minivan / Westlake, Ohio
-
After 9 seasons, we realized the extra play in our 2017 320 CSS was the broken plastic hinge. We ordered the replacement window from Missouri Teardrop Trailers and received and installed the new window and required flathead screws. Extra latch brackets were included, but not needed as the originals and location lined up with the new window . Part number 24426 PRICE: $308.99 + tax and shipping. It arrived in 1-2 days. Our gasket (seal) and gasket filler were intact and did not require replacement, so, be sure to check that before you place your order as they were initially going to send us the whole package.
Thanks to Maxcamp above and rh5555 in this discussion linked here
https://tab-rv.vanillacommunity.com/discussion/comment/195394#Comment_195394
we were able to replace the old window with the plastic hinge, with the new, metal hinged window.The black plastic stop on the passenger side of the old window was removed by tapping with a screwdriver and hammer. The window was then slid over to the drivers side and removed. Then the old hinge was unscrewed and removed and the adhesive cleaned up with 3M Adhesive remover using a rag. (DH said it was like magic!). Old screw holes sealed with clear, all purpose sealant.
Next, we secured the support arms with tape, placed the hinge on the new window, then secured the window in place using the inside latches, bottom, then the sides in the vent position keeping the window centered. (Not sure why we needed to use the “vent” position of the latch, but it worked.)
With the window temporarily in place, we applied masking tape to the trailer with the bottom edge aligned with the top of the hinge and marked the ends of the hinge on the tape.
Removing the window after tape applied to trailer. Then removed the hinge from the window.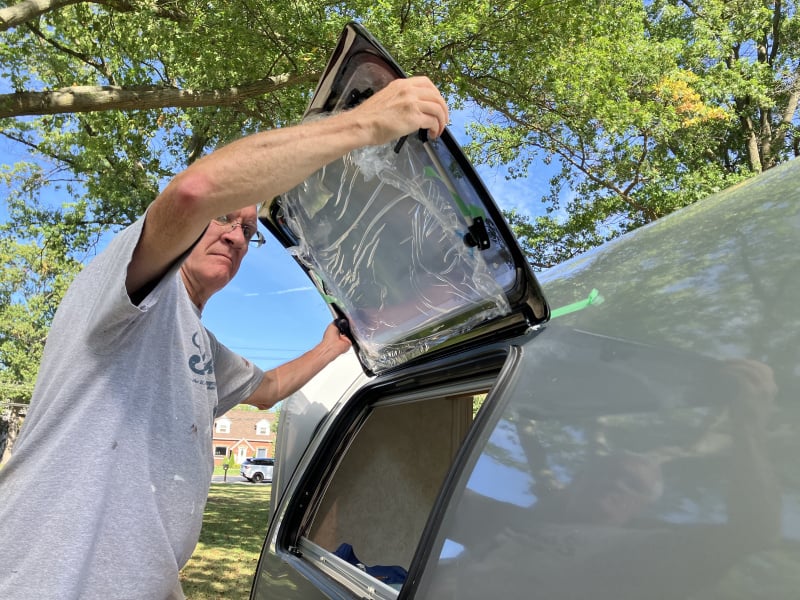 Tape and the old holes sealed with clear sealant.
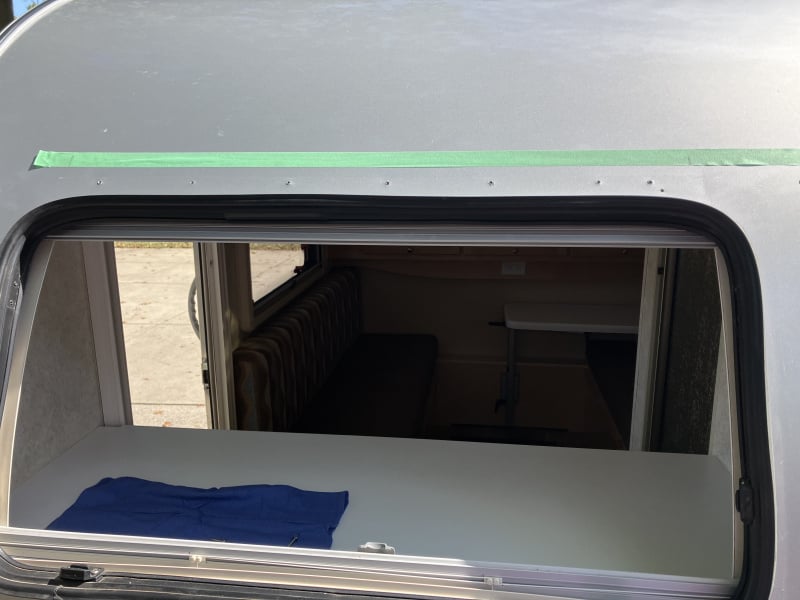 Hinge mounted with top edge 1mm higher than the bottom edge of the tape. No pilot holes required. Self tapping screws worked easily.
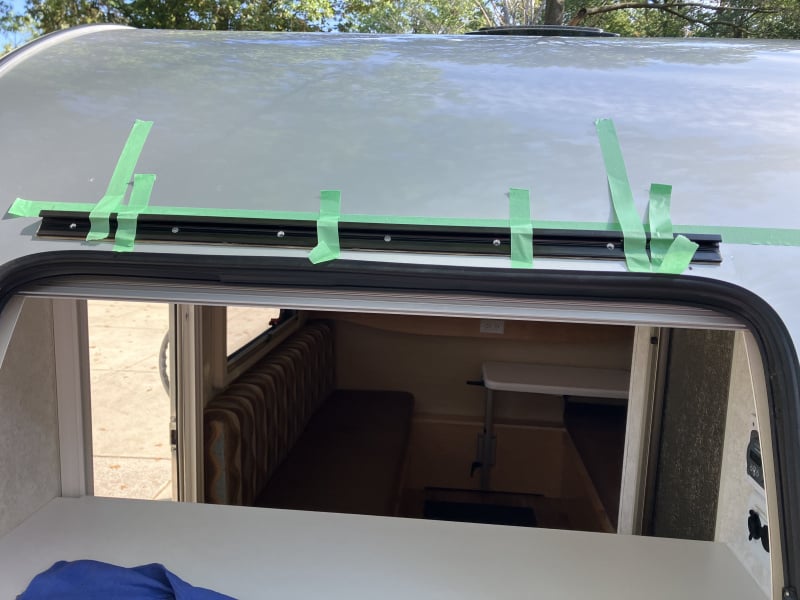 Trial run before we removed the adhesive backing on the hinge. (Smart move rh5555!)
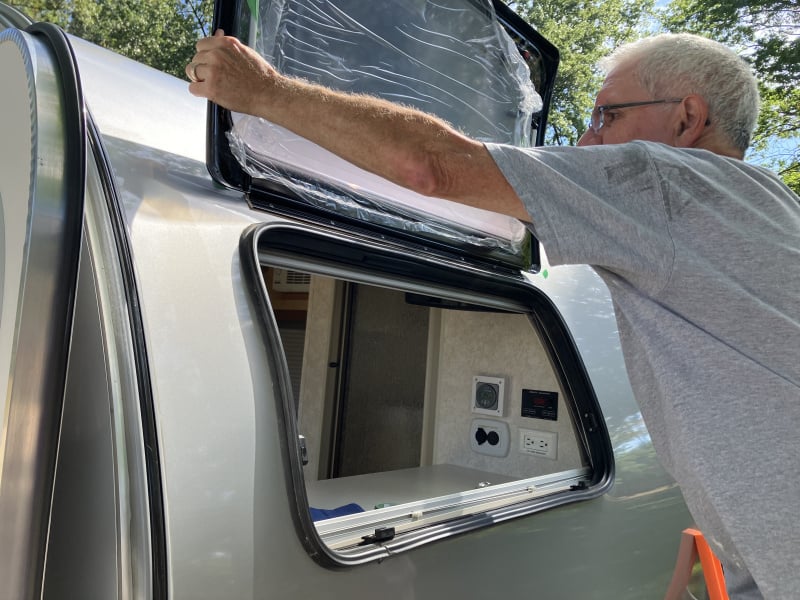
Here are the old and new mounting holes. The old holes on the bottom become covered by the new hinge.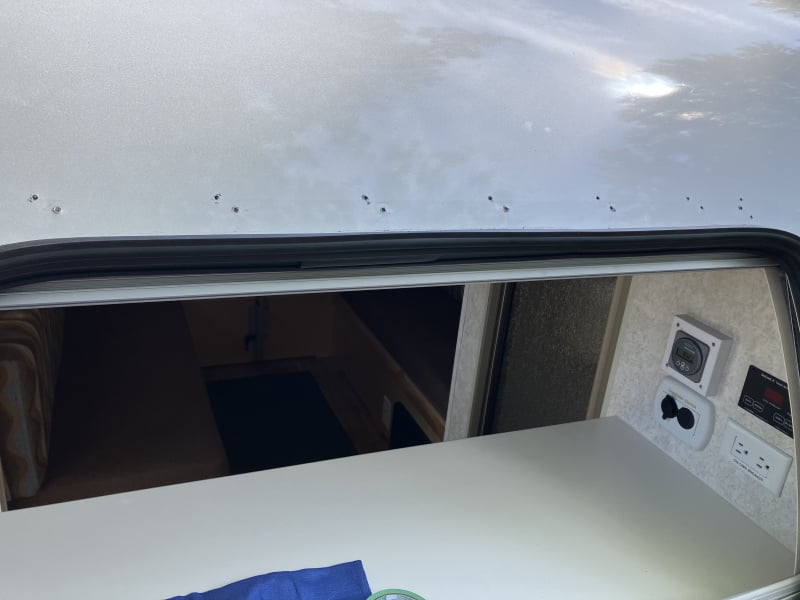
Hinge in place. Replacing the window requires a severe tilt above the opening. Then it was easy to reattach to the inside support arms.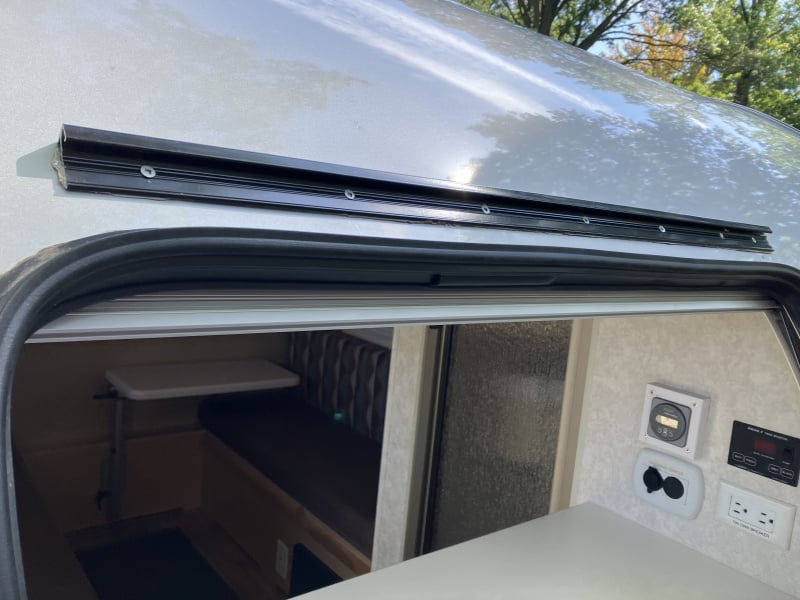
Lastly, we caulked the top edge of the hinge with GeoCell.
Don’t be afraid to do this yourself. We typically don’t do DIY, but, other than fretting about making more holes in the trailer, it was a relatively easy job. I am really surprised that there is so little info out there about this procedure ( no YouTube😂).Sharon / 2017 T@B CSS / 2015 Toyota Sienna Minivan / Westlake, Ohio -
Thank you all! I just ordered a new 400 window this morning and these write-ups will be quite helpful.Rich2019 T@b 400
2025 Toyota Highlander 2.4L TurboBellingham WA -
I feel like I am going to puke. We are not DIY people at all which means we will be paying labor to fix this. We don’t own tools except very basic. I am so angry with NuCamp right now. The window fell out, the cabinet doors are falling apart, the shelf above the passenger side window fell down. Things were going so great for so long.2019 Custom T@B 320 U Boondock Lite-ish
Custom Colors & Custom Interior
We've slept in 34 states, 2 countries & counting -
Update that is not really an update. I’ve spoken to Dan at the distributor and the manufacturer will be producing a new old style window and expect it to arrive in March. You will be able to just slip it in to the old frame If it’s just that your clip is broken, which ours is. Stand by for news!2019 Custom T@B 320 U Boondock Lite-ish
Custom Colors & Custom Interior
We've slept in 34 states, 2 countries & counting -
@ColleenD2 Any update on “new” old window? What is contact info for Dan at distributor. Who is manufacturer?2022 T@B 320S Boondock


Categories
- All Categories
- 10 Cirrus Truck Campers
- 118 Dutchman and Vintage TaB Archives
- 3 Forum Rules
- 3 nüCamp & Forum Contacts
- 950 Air Conditioning & Refrigeration
- 2.6K Battery/Electrical & Solar
- 1.2K Camping & Travel
- 142 Events & News
- 219 Factory Comments
- 19 "FOR SALE" - New/Used Trailers
- 15 “FOR SALE" - Camping & Trailer Gear
- 2.4K Heating/Plumbing & Winterizing
- 136 Help - Computer & System
- 916 Introductions
- 407 Looking to purchase a trailer?
- 2.1K Modifications & Upgrades
- 1.4K Products and Accessories
- 402 Service/Maintenance & Recall Notices
- 37 Solo Travelers Hints & Tips
- 1 T@G Forum
- 72 Teardrop Groups & Links
- 77 Testimonials
- 914 Tips & Tricks
- 1.5K Trailer & Towing
- 27 Owners Manuals/PDF Files/Videos & Resources
- 62 üCamp Rally - News & Information