Floored. A rebuild project.
Comments
-
Surely you are not getting rid of the flamingo wall paper!😂Sharon / 2017 T@B CSS / 2015 Toyota Sienna Minivan / Westlake, Ohio1
-
The Flamingo wallpaper will return, with a better application now that the cabinets are out.
1 -
... And the frame is finally off the shell. There were two hidden screws under the door that were holding the last of the floor sub-frame, so I loosened the door - will have to re-seal that too, but I'm pretty sure there isn't a seal that I won't be checking.


There will be lots of cleaning, checking, and adjusting before I install the new floor. for the moment, this feels very satisfying.5 -
Congratulations on reaching the mid point, should be all downhill now. The rip out seems to be the most difficult when trying to preserve as much as possible.
Good luck,on rebuilding the floor. Are you going back to ply or Azdel?Cheers2018 TaB400 Custom Boondock, Jeep Gladiator truck, Northern California Coast.0 -
Adzel - no points in using something as destructive as ply again. I'm not interested in using that much polyurathane either.
-P0 -
I hear you in that. Azdel is the way to go. Good luck with the install.
Cheers2018 TaB400 Custom Boondock, Jeep Gladiator truck, Northern California Coast.0 -
FWIW During our second floor replacement Austin replaced the foam insulation with 1" plywood and pocket screws into the floor frame members. Very solid and unlike any T@B floor I've seen or felt. IIRC he said it is how they rebuild the T@DA floors. Maybe worth considering.
 0
0 -
And Austin told me last week they now can offer "Azek" for those who want a more solid floor with less flex. I had asked for a quote on a floor replacement. Not sure if that decking material replaces the top vinyl sheeting or is used internally to replace the foam blocks.
2021 Jeep Gladiator, 2021 tiny toy hauler, Austin TX
Former steward of a 2017 T@B S Max0 -
pjalau you should be satisfied as what you are doing is a big and a great job! Keep up the good work and keep us posted as I for one like reading about your adventure! Art2019 TaB 320 S Boondock Edge1
-
@pjalau
Great progress on your repair. I'm more than impressed that you've been able to dig all that rot out and get the body completely separated from the frame. Look forward to seeing how the restoration goes!2025 T@B 400 Boondock Black Canyon with 400Ah Battle Born and Victron Multiplus 3000
2025 Honda Ridgeline Black Edition with Redarc Trailer Brake Controller1 -
The Azdel is a sub flooring, replacing the plywood.2018 TaB400 Custom Boondock, Jeep Gladiator truck, Northern California Coast.0
-
I've got some cleaning up to do before I drive the frame down to Ohio tomorrow. Nucamp will be replacing the sub frame and floor. If anyone wants pictures of the any specific parts before this all gets covered, now is the time to ask.
")


A small note. I put a bit of stress on the frame while removing it from under the shell. The welds on the front popped, but I'm not sure how strong they were in the first place.

I'm replacing all of this.
Yesterday's post-removal beer was very satisfying.
As always, to be continued.3 -
We all have got to hand it to you for your work! Art2019 TaB 320 S Boondock Edge0
-
I'm almost positive that the subframe will be replaced with new along with the flooring pieces. It is full replacement pre-assembled and bolted to the main frame.Carol
MOUSE-KE-T@B
2007 Dutchmen T@B Clamshell #2741
2022 nuCamp T@B 320 CS-S
2021 F-150 502A Lariat SuperCrew, 3.5 EcoBoost 4x2
Harvest, AL0 -
I agree, the sub assemblies are all pre-built and the components assembled on the line. All the tours I have seen do not show a metal shop, and the aluminum frame assemblies are probably made by a sub contractor, along with the frame.
So I would think the only bit from the OP’s frame that will be reused, is the main frame and axle assembly, which appears to be in good kit.Sometimes is it less expensive to replace a sub assembly like the aluminum floor frame with a new one, rather than trying to repair the old one, which appears to have several issues. I would hope the main frame is cleaned up, and repainted before the new floor frame is added back on.
cheers2018 TaB400 Custom Boondock, Jeep Gladiator truck, Northern California Coast.0 -
Exceptional progress made this weekend. I waved a magic wand, sprinkled some dust, threw some bones, burnt an effigy and:
-Cleaned the frame and removed all the rusty bolts
-Welded a new aluminum frame
-installed adzel floor
-installed underlayment (the tyvek-type stuff on the bottom)
-added new wheelwells
-installed original linoleum floor
-acquired the under-rails to rebolt the camper down
-cut a piece of diamond place to replace the old one
... and by that I mean, I drove to Ohio and had Nucamp redo the floor. I had arranged this months ago when I first started looking at the project, and Austin had been guiding me here and there throughout the process. It became apparent after the first few steps that this was going to be a big fix, not a small one, and we arranged a date/time for the factory to do a new floor.
Note: This is not something they normally do, please don't ask them if they can do the same - this took months of arranging and some extensive negotiating for time.
I am ready to finish cleaning up the interior and getting the shell to fit correctly before applying glue.
This is the linoleum before being glued down.

Here are a few upgraded projects sitting outside the shop
I'll be applying this soon:
And this:
Hello corporate headquarters!
Taped and strapped for the drive back:
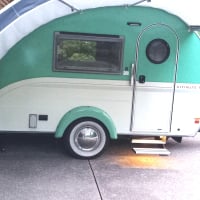
And I'm back in the driveway.
Austin says hi!
I've gotten a number of tips and suggestions here, thanks everyone for the thoughts.
I wasn't able to repaint the trailer, but I did clean/wax it before I drove it to Ohio. It was fine, but I need to get the bearings adjusted/repacked. There was a little more wheel vibration than there should have been and I can feel a little play in the wheels with my hands. I'll deal with that before I get it back on the road.
As long as I've got this off the frame, any suggestions for improvements?
Aloha and thanks.
-Peter
3 -
(EDITED)
OOPS I didn't realize the floor has already been replaced ! Gongrats !
One suggestion Google: Transonite floor. It's the material that is synthetic that SHOULD have been used for all T@B flooring.
Worthwhile to consider making your new floor from this stuff.
https://www.creativepultrusions.com/index.cfm/products-solutions/transonite-panel-system/
Sending you virtual beers"I know one thing, I know nothing."0 -
You were in good hands @pjalau! You will have a like new TaB by the time you finish!Sharon / 2017 T@B CSS / 2015 Toyota Sienna Minivan / Westlake, Ohio0
-
@FuzzyYanni, the OP had his floor replaced at the nüCamp factory with an Azdel Composite Floor, used in all current TaBs. Azdel is an excellent composite panel, with a proven track record.
cheers2018 TaB400 Custom Boondock, Jeep Gladiator truck, Northern California Coast.1 -
And after another little break, I'm back with updates.
The floor/frame was back home, I gave the sealant a little time to cure. The shell has been suspended in air during the curing process, and we are back to our regularly scheduled program.
Step one: clean the old sealant off using a scraper, some goo-gone, some more scraping, some more goo-gone, some more scraping, some more goo-gone.... ad nauseum. The old wheel well sealant is effectively gone as is all the old caulking.
Old and busted:
New Hotness:
Step two:
Carefully back in the trailer and visually line it up as best you can.
Step three: Get a friend and a floor jack. Use the floor jack to lift the corner and remove the jack stand. slowly, and more slowly lower it onto the corner so you don't damage the sides, while still getting the metal part of the shell frame to drop on the rail of the floor. The tab will not be square when you do this, and it may take some patient manuvering.
This gap between the metal rail on the back needs to be closed and both rails need to be pressed next to each other.
Once both corners and lined up and the rear rails are square, put down the real stabilizers, and slowly lower the front so the the side guides and wheel wells are correctly seated on the outside of the frame.
Does everything look good? Lined up? square? Awesome.
Crank the handle and raise the front up to meet the shell, and breathe out once the weight of those handles is removed from those cinder blocks. As of now, you are back on the frame.
Go ahead and open up that special beer that you have been saving, because this is very satisfying and requires a proper drink.

There are a number of steps that need to be redone, now that I know the new frame fits correctly.
1. There is a piece of custom-cut angled wood that sits on the front where the curve of the shell meets the frame. It needs to be installed, and it it doesn't fit right, needs to be shimmed. I'm measuring that out now before I glue and screw it on.
2. The shell will be lifted and glued in sections while I seal it up, but I no longer have to have the entire shell off the frame while I do it. (This allows some maneuverability that I didn't have before.)
3. There are a love of support pieces within the frame that I need to recut and place, but that is relatively easy now.
4. I now have working stabilizers.
Thanks for everyones support, I'll post another update when I have one.
Peter2 -
Austin is Superman.
2021 T@b 320 Boondock "Mattie Ross" | 2021 T@b Nights: 239 | Total nights in a T@b 455 | 2022 Jeep Grand Cherokee L Overland | T@b owner since 2014
0 -
I'm so glad you are posting this. I started my own Tab floor replacement Odyssey a couple of weeks ago and it has been encouraging to see your progress.
'07 Thor T@B, '07 Ford F150 Lariat 1
1 -
It's not easy, and I don't recommend it to anyone who isn't REALLY handy and determined. But if you are going to redo the floor correctly, it's the least expensive way.
As for me, I'm enjoying the physical activity, and the challenge. There are worse ways to spend the apocalypse.
P1 -
I really didn't have a choice; my floor was toast when I bought this T@B. The plywood was disintegrating and the floor was sagging badly in front of the door. The aluminium frame was bent behind the right wheel well and broken completely in front of it. The water damage had already spread up into the lower couple of inches of the walls in places.But I'm handy enough. My floor is out and the shell is up on blocks already. A trip all the way to Ohio to pick up a new floor wasn't an option for me so I'm building my own.'07 Thor T@B, '07 Ford F150 Lariat1
-
OH.MY.GOSH! You have totally convinced me that 5k-7k for a total replacement is worth every penny!! 🤣🤣🤣🤣HB 2009 DM T@D@ being towed by 2021 Subaru Ascent Asheville, NC/Clayton, GA1
-
Thanks for taking the time and energy to post up the step by step sequence of your project as these types of endeavors help others who may consider it or convince them that is much larger than they are capable of tackling. Good stuff and my hats off to you for your tenacity and endurance in making it all come together. Bravo!!!!Mike - Elmira, Mi / 2019 T@B 400 / 2021 Chevy Silverado LTZ2


Categories
- All Categories
- 10 Cirrus Truck Campers
- 122 Dutchman and Vintage TaB Archives
- 3 Forum Rules
- 3 nüCamp & Forum Contacts
- 957 Air Conditioning & Refrigeration
- 2.6K Battery/Electrical & Solar
- 1.2K Camping & Travel
- 142 Events & News
- 219 Factory Comments
- 21 "FOR SALE" - New/Used Trailers
- 14 “FOR SALE" - Camping & Trailer Gear
- 2.4K Heating/Plumbing & Winterizing
- 141 Help - Computer & System
- 922 Introductions
- 408 Looking to purchase a trailer?
- 2.1K Modifications & Upgrades
- 1.4K Products and Accessories
- 411 Service/Maintenance & Recall Notices
- 37 Solo Travelers Hints & Tips
- 1 T@G Forum
- 75 Teardrop Groups & Links
- 78 Testimonials
- 918 Tips & Tricks
- 1.5K Trailer & Towing
- 27 Owners Manuals/PDF Files/Videos & Resources
- 55 üCamp Rally - News & Information