Voltage Drop and Other Solar Musings/Solar Lunchbox
Comments
-
Ahhh, makes sense. I assumed such fusing would be standard, but I guess every unit is a bit different. Having only owned one camper (purchased on impulse) I've gotten quite an education on RV construction hanging out here!
More snow yesterday (April Fools!) so I had plenty of time to continue pondering my own solar reconfiguration. Let us know what you eventually come up with for a protected controller enclosure--I'm mostly committed to relocating the controller, but still debating interior vs exterior mounting.
2015 T@B Max S (320)
2015 Nissan Frontier SV V6 4x40 -
I thought fusing was standard too. I have the camper plugged in, but wanted to put away the cord for a few days when we had all that ice (sorry for your snow!!!!). That's when I found that the battery was still connected and unfused!
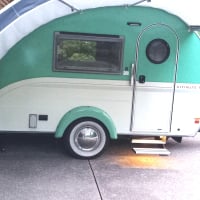
Sorry for the fuzziness of the picts. Hard to take close-ups with tremors.
Where the negative (white wire is grounded (frame) and where the positive connects are, you'd expect a fuse or cut-off, right? Then it goes to the junction box - out of that comes the black and white wires to the battery, then the pigtail for the TV and two tiny black wires for the emergency electric brake pull.


2017 820R Retro Toy Hauler from 2015 Tabitha T@B from 2009 Reverse LG Teardrop (but a T@Bluver at heart)0 -
The labels below show what I think is going on based on your photo and description. Based on how the T@B is wired, here's what I would expect:
The black (+) line from the battery would have a fuse near where it connects to the battery (probably in the battery box).
From inside the junction box, the + line from the battery should continue through the harness to the inside, eventually ending at the converter. I would expect to find a fuse there, too (probably labelled "battery charger").
A cut-off could be installed in either of the above lines (i.e., somewhere after the battery but before the converter).
2015 T@B Max S (320)
2015 Nissan Frontier SV V6 4x40 -
You got the neg and positive backwards. That's why I included the signage. The black wires in the red junction are positive ones. The white one is connected to the frame and is the negative (ground). Got the TV pigtail right and the harness inside correct. The black and white wires are going TO the battery. No fuse in the converter (pulled all of them out) stops the battery power. That's with all breakers on the 110V side off and no plug in to shore power. I can hear the converter fan turn on.
I expected a fuse between that red junction or in that red junction. None in the black junction box. I opened it and checked. Removing that red junction and putting in my combo fuse and cut-off should work. It's waterproof. I'm almost wondering if there's a fuse under the red bottom part of that junction.
I couldn't stand it. Had to go for a bike ride today. Sorry for all the folks up north in the snow, but it was 63F out today and sunny! Didn't get to work on the camper at all!2017 820R Retro Toy Hauler from 2015 Tabitha T@B from 2009 Reverse LG Teardrop (but a T@Bluver at heart)0 -
That "red junction " is a 30 amp circuit breaker. It disconnects (opens) with excessive load and resets automatically after a few minutes of cooling off. They are known for becoming intermittent and troublesome if they become corroded. The outside, frame mounted location doesn't help.
It is a common automotive part and available at most auto parts stores.
https://groups.yahoo.com/neo/groups/tabtrailers/photos/albums/561338276/lightbox/1014502189?orderBy=ordinal&sortOrder=asc&photoFilter=ALL#zax/1014502189
 1
1 -
Yup, that's what I understood regarding the black vs white wires--I think my labels were a little ambiguous. Your proposed combo fuse and cut-off location seems reasonable.
Glad you got a ride in. I took a short spin two weeks ago, but the roads got cruddy again after that. Lots of melting today, though--spring's comin'!
2015 T@B Max S (320)
2015 Nissan Frontier SV V6 4x40 -
Thanks Scott and rfuss!! Mystery for the "lack of fuse" solved. A fuse is there. The breaker/fuse thing I got will work great as a cut off in that location.
Now, getting a waterproof box to put the trimetric monitor and neg shunt and solar charger and then putting it beside the battery. I'm going forward here!!2017 820R Retro Toy Hauler from 2015 Tabitha T@B from 2009 Reverse LG Teardrop (but a T@Bluver at heart)0 -
Good to know, thanks rfuss. I'm not familiar with those devises and figured it was just a junction strip of some sort. Ya' learn something new every day here!
2015 T@B Max S (320)
2015 Nissan Frontier SV V6 4x40 -
It's sorta like playing "hide and go seek" when finding valves and fuses. On the Retro, there's the same CO/propane detector and Jensen unit. I know (from here) there are fuses behind those. I knew there was a battery fuse, I just had never seen that type (thanks again rfuss!).
Just last night, I realized that not only do I have a hot water heater by-pass (for winterization - normal HW tank), I have an EZ-winterization kit installed on my camper. Yay for YouTube and here! It's not that my "walk-thru" on the Retro was deficient, it's just that it's a different beast.
I guess my expectations have gotten way high from hanging around here. Clear and simple information with pictures for us "paragraph impaired" folks. So much knowledge that has helped me and made me realize how deficient my knowledge has been, even after owning small campers with varying amenities since 1993.2017 820R Retro Toy Hauler from 2015 Tabitha T@B from 2009 Reverse LG Teardrop (but a T@Bluver at heart)1 -
Ok, with the snow (almost) melted it was time to stop musing and start modifying my 100W Renogy suitcase w/ controller. I had three objectives: extend the reach of my panels, relocate my controller to the T@B, and retain the portability and versatility of the stand-alone suitcase. (Yes, I wanted it all!) I didn't have a clear plan, but once I started cutting and splicing it all kinda' fell together. Here's a summary of what I did--I'll leave out the technical details but am happy to answer any questions...
- Removed the controller and its hinged bracket from the suitcase. Added MC4 connectors to the suitcase leads.
- Built two extension cables (one 10' and one 25') with MC4 connectors on both ends.
- Built an MC4 to SAE adapter to allow use of the extension cables with the existing Zamp port on the tub.
- Added pigtails with MC4 connectors to the controller, and mounted the whole assembly in a portable steel case (in this case, a 1970's vintage school lunchbox).
In the tub I did the following...
- Removed the existing Zamp cable from the battery, routed it outside the battery box, and replaced the ring terminals with MC4 connectors.
- Built a new cable with MC4 connectors on one end and ring terminals on the other. Ran this cable into the battery box to the battery terminals. A fuse holder and 10A blade fuse was spliced into the positive lead.
The controller can now sit on top of the battery box and be plugged into the new harness. It's out of the elements, but still easily accessible for monitoring purposes. Once the panels are plugged into the external Zamp port, the system is up and running.
Attaching the four separate leads of the controller harness is a little more futzing than I would prefer, but this arrangement still allows for use of the suitcase independent of the T@B. The controller is fully portable and can be plugged directly into the panel leads, and the battery clamps that originally came with the suitcase (and have their own 10A fuse and MC4 connectors) can be plugged directly into the controller.
2015 T@B Max S (320)
2015 Nissan Frontier SV V6 4x41 -
Well done Scott. Gotta love those quick connect devices.Sharon / 2017 T@B CSS / 2015 Toyota Sienna Minivan / Westlake, Ohio0
-
I don't have a bin to hide a lunchbox in, but that seems the PERFECT size. Gotta get a beatup one with a hated childhood character on it for people to leave it alone LOL2017 820R Retro Toy Hauler from 2015 Tabitha T@B from 2009 Reverse LG Teardrop (but a T@Bluver at heart)0
-
It's even more perfect than it appears. The little "nubbins" in the lunchbox that kept the Thermos (long gone...) in place also serve to support the controller bracket in the down position.
The best part is I was already in mid-project before the lunchbox came to my attention. Seriously, I couldn't have planned it better if I'd tried. :-)
If I'd had my old Peanuts or Six-Million-Dollar-Man lunchbox available (or ericnliz's Scooby-Doo), I might have used one of those. Problem is, I could see those being coveted even more! ;-)
2015 T@B Max S (320)
2015 Nissan Frontier SV V6 4x40 -
The only problem is that every time I deploy my solar panels I get a craving for a ham sandwich...
2015 T@B Max S (320)
2015 Nissan Frontier SV V6 4x40 -
I wonder if the plastic lunch boxes would work? The controller does need some heat exchange on the Trimetric.2017 820R Retro Toy Hauler from 2015 Tabitha T@B from 2009 Reverse LG Teardrop (but a T@Bluver at heart)0
-
Don't see why not. I was experimenting with a plastic case before the metal one surfaced. You make a good point about the heat exchange--I'd suggest whatever you do you either vent the box or leave the lid open when it's in use (which is probably what I will do).
2015 T@B Max S (320)
2015 Nissan Frontier SV V6 4x40 -
I still like the concept of a metal Scooby Do one... I had that one as a kid.
But then... I should be careful of grounding out something on the metal!
2017 820R Retro Toy Hauler from 2015 Tabitha T@B from 2009 Reverse LG Teardrop (but a T@Bluver at heart)0 -
We are in the process of doing the same thing and ran across this thread! We recently purchased the Renogy 200 Watt 12 Volt Monocrystalline Solar Starter Kit with Wanderer from Amazon.com (which is now further discounted to $237.66! We thought we got a deal at $339.99). Plan to construct our own "suitcase" with the controller close to the battery. Your ideas have further confirmed our thought pattern! Thanks! Have any of you used the setup as yet or have further suggestions?
Chris and Rick, 2017 T@B Max S with 2010 Ford Escape TV0 -
I'll be giving it a trial run over Memorial Day, but the real test will be few weeks later when we tackle a full 8 days in one spot without hookups. I plan to just leave the controller sheltered in the battery tub while in camp.
If you are building a similar set-up from scratch, I suggest using 10g conductors in your long extension cable in order to keep the voltage drop to 3-4%. I used 12g 'cause I'm cheap and I happened to have 30' of it lying around. The voltage drop is a little >5%, but I'm not too worried since it's upstream from the controller which is now parked right near the battery. I figure I'll still come out way ahead since I'll now be able to (hopefully) get the panel into full sun for significant periods of time.
2015 T@B Max S (320)
2015 Nissan Frontier SV V6 4x40 -
Is landscaping wire acceptable? 12g?2015 T@B Max CS-S Silver and Black
Goes where it's towed to by 2017 Subaru Outback0 -
Runtarooti said:
Is landscaping wire acceptable? 12g?
Copper is copper, so I don't see why not. If you scroll up you'll see Nomad uses it. (BTW, where is "Nomad" these days?)
Landscape cable is suitable for direct burial so is presumably weatherproof. The casing is relatively thin, however, so it may not stand up to abuse. It's pretty flexible, but it's flat nature does restrict it's bendability a bit.
Whether 12g is acceptable depends on several factors, including the output of your panels, the length of your extension, what type of controller you have, and where it is located. In general, these considerations will be less of a concern with heavier (10g) wire. I'd try the 12g if I had it lying around, but if I was looking to drop coin I'd stick with the 10g.
2015 T@B Max S (320)
2015 Nissan Frontier SV V6 4x40 -
ScottG: We already have the components, including 10G 20 ft extension from Renogy and in-line fuses. We were tossing around where to mount/keep the controller and our thought process for quick connection/release of battery and PVPs. Loved your idea using the lunchbox. I'm on a search in our basement for our son's old lunchboxes! Possible choice of Star Wars or Dukes of Hazzard.....Thanks again!Chris and Rick, 2017 T@B Max S with 2010 Ford Escape TV1
-
pittchristine said:ScottG: We already have the components, including 10G 20 ft extension from Renogy and in-line fuses. We were tossing around where to mount/keep the controller and our thought process for quick connection/release of battery and PVPs. Loved your idea using the lunchbox. I'm on a search in our basement for our son's old lunchboxes! Possible choice of Star Wars or Dukes of Hazzard.....Thanks again!
I wanna see your final product!! I need to look at lunchboxes .... hrm... which to get? @ericnliz, don't you dare suggest Wonder Woman! That's reserved for our female mod monsters (it's the T@B University Expert Mod Trophy). If my camper is named "Afire", what lunchbox would be appropriate? Suggestions welcome. *braces self*
Edit: oooooooo.. found this one!
https://www.amazon.com/Aquarius-Zombie-Survival-Large-Tin/dp/B008DREYFO/ref=pd_sim_21_44?_encoding=UTF8&pd_rd_i=B008DREYFO&pd_rd_r=V011FWHYT5JMXQPHJF3F&pd_rd_w=xfKA5&pd_rd_wg=L3Gnw&psc=1&refRID=V011FWHYT5JMXQPHJF3F
Ooooooo HarleyQuinn...
https://www.amazon.com/Comics-Poison-Harley-Lunchbox-Carryall/dp/B00X0LJG8S/ref=sr_1_86?s=toys-and-games&ie=UTF8&qid=1494456084&sr=1-86&keywords=metal+lunch+box
2017 820R Retro Toy Hauler from 2015 Tabitha T@B from 2009 Reverse LG Teardrop (but a T@Bluver at heart)2 -
@pittchristine, another thought I had is to connect the controller to the trailer using a single four-pin 30A twist lock connector (commonly used for generator connections). I may yet go this route after a season of field testing.
This would be simpler than fiddling with four separate MC4 connectors, but would require additional adapters to use the controller as a stand alone charger. (Twist lock connectors are also quite expensive--see previous comment about being cheap...) It really all depends on how you plan to use your equipment, and your tolerance for futzing with set-up.
2015 T@B Max S (320)
2015 Nissan Frontier SV V6 4x40 -
@ScottG, Personnaly, prefer to use the K.I.S.S. method!
") Open suitcase for panels, stretch out 15' extension wires ( wrapped in plastic auto wire cover to keep as one wire) set panels, plug into Zamp port, done. Take-down, reverse operation, done!
Open suitcase for panels, stretch out 15' extension wires ( wrapped in plastic auto wire cover to keep as one wire) set panels, plug into Zamp port, done. Take-down, reverse operation, done! ") 2016 T@B MAX S-aka: WolfT@B
2016 T@B MAX S-aka: WolfT@B
TV: 2006 Chevy Avalanche LT Z71 aka: WhiteWolf, or 1972 Chevy Custom10 P/U aka: SnarlingWolf
Spokane, Wa.
Eric aka: Lone Wolf0 -
No argument there, but I wanted more than 15' of reach, and didn't want that much voltage drop downstream from the controller.
I also wasn't that fond of having the controller on the panels; it's harder to monitor, not well protected from the weather, and lots of spindly little terminal connections to be careful of.
Which approach is more in the spirit of KISS is kinda' subjective...YMMV!
2015 T@B Max S (320)
2015 Nissan Frontier SV V6 4x42 -
I use the same type of idea but trolling motor connection - easy, quick, weatherproof, also.ScottG said:@pittchristine, another thought I had is to connect the controller to the trailer using a single four-pin 30A twist lock connector (commonly used for generator connections). I may yet go this route after a season of field testing.
This would be simpler than fiddling with four separate MC4 connectors, but would require additional adapters to use the controller as a stand alone charger. (Twist lock connectors are also quite expensive--see previous comment about being cheap...) It really all depends on how you plan to use your equipment, and your tolerance for futzing with set-up
2021 T@b 320 Boondock "Mattie Ross" | 2021 T@b Nights: 239 | Total nights in a T@b 455 | 2022 Jeep Grand Cherokee L Overland | T@b owner since 2014
0


") take it out with 'ya!
take it out with 'ya! 

Categories
- All Categories
- 10 Cirrus Truck Campers
- 122 Dutchman and Vintage TaB Archives
- 3 Forum Rules
- 3 nüCamp & Forum Contacts
- 958 Air Conditioning & Refrigeration
- 2.6K Battery/Electrical & Solar
- 1.2K Camping & Travel
- 143 Events & News
- 219 Factory Comments
- 19 "FOR SALE" - New/Used Trailers
- 13 “FOR SALE" - Camping & Trailer Gear
- 2.4K Heating/Plumbing & Winterizing
- 141 Help - Computer & System
- 922 Introductions
- 408 Looking to purchase a trailer?
- 2.1K Modifications & Upgrades
- 1.4K Products and Accessories
- 411 Service/Maintenance & Recall Notices
- 37 Solo Travelers Hints & Tips
- 1 T@G Forum
- 75 Teardrop Groups & Links
- 78 Testimonials
- 918 Tips & Tricks
- 1.5K Trailer & Towing
- 27 Owners Manuals/PDF Files/Videos & Resources
- 55 üCamp Rally - News & Information