Best Of
Re: 2013 T@B Little Guy-damaged grey water tank?
Where is this thing exactly? The tank itself is pretty hard plastic. Under the shower area there is a cover for the shower trap that is a metal rectangle, but the shape and position of what is "dangling" appears wrong.
Have you crawled under there to see what you can see?

Re: 2013 T@B Little Guy-damaged grey water tank?
Yep, as @Grumpy_G noted the metal brackets have failed.
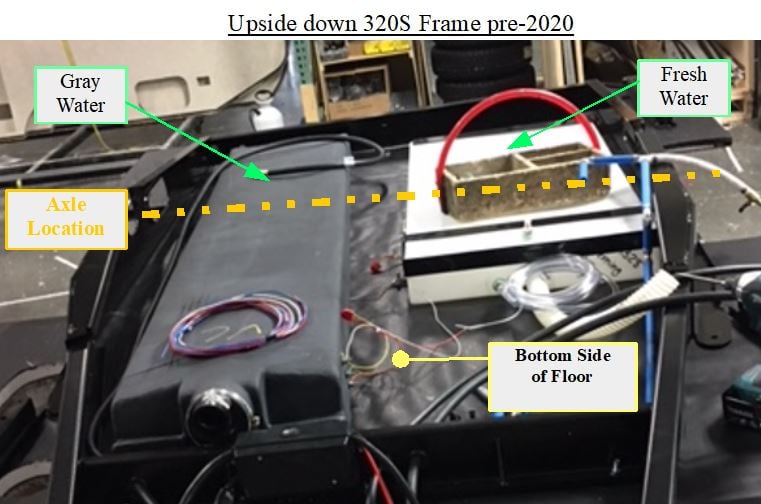
That is the Gray Water Tank . . . not something connected to it 😉
Your 2013 should be about the same as this picture :

Re: 2013 T@B Little Guy-damaged grey water tank?
Affirmative. There are (or should be) two metal brackets that hook around the edge of the tank right where the rust stains are.
 Grumpy_G
Re: low pressure campstove
Just to comment on the Nexgrill that @Mouseketab linked to above. We use to go through an outdoor grill every couple of years. They'd rust out and basically fall apart. We finally broke down and bought a stainless steel Nexgrill about a dozen years ago and it's still hanging in there. Had to rebuild the burners a couple of time, but other than that, it's held up really well. I highly recommend the brand (hoping that it hasn't changed hands since our purchase).
 AnOldUR
Re: Not getting water to kitchen sink - RESOLVED
@pthomas745 you saved the day! Thank you so much! It worked like a charm😊
Re: Not getting water to kitchen sink - RESOLVED
I’ve double and triple checked the valves but I don’t know how much water is in my tank. I’ll top it off and lower the front of the trailer and work on pressurizing the lines. Thank you! I’ll let you know how it goes
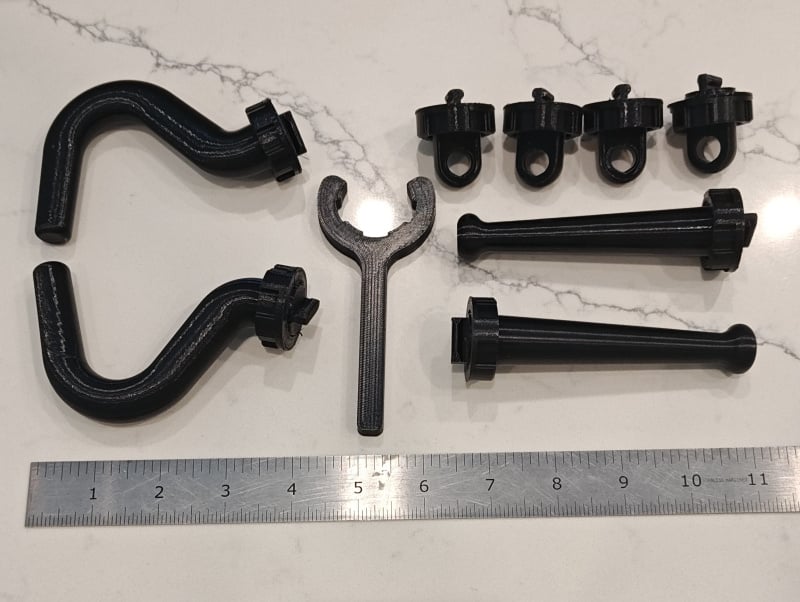
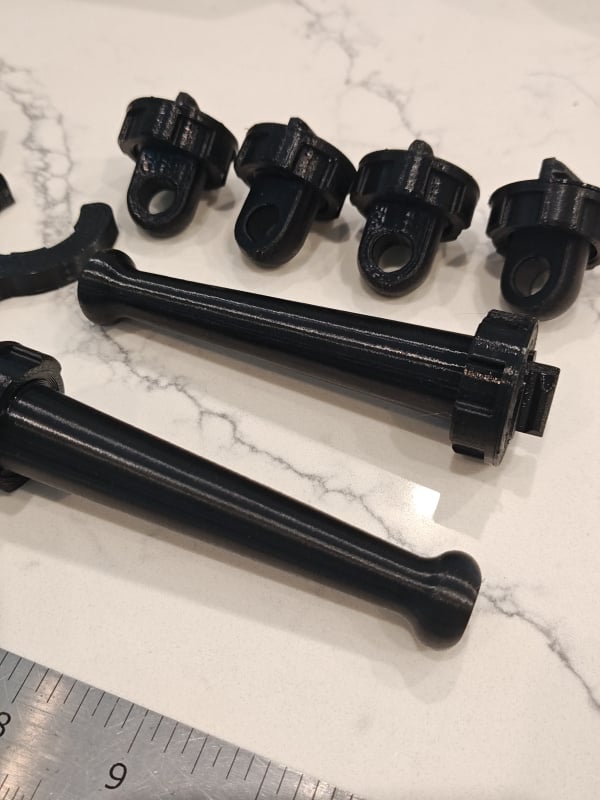
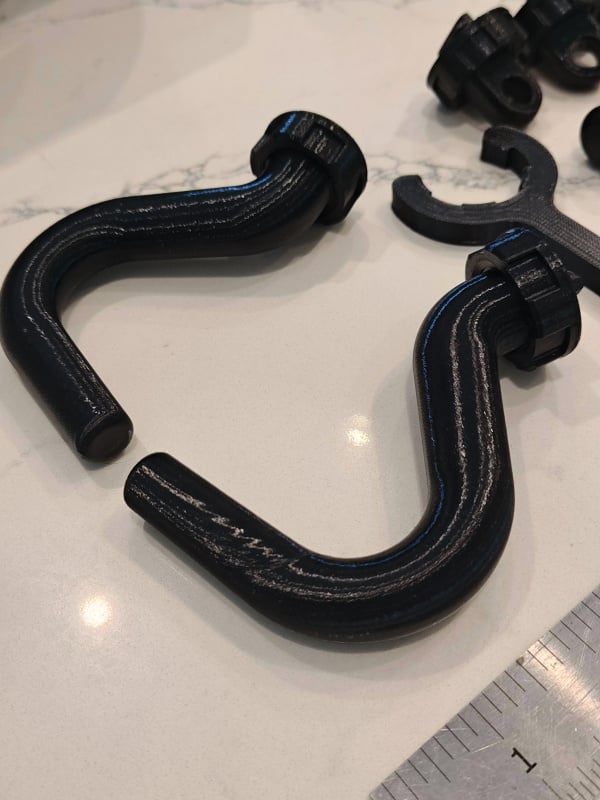
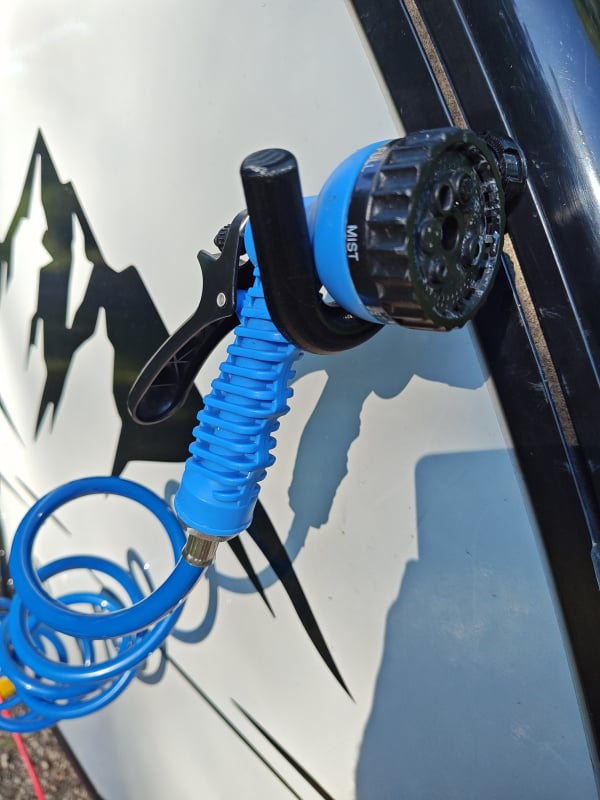
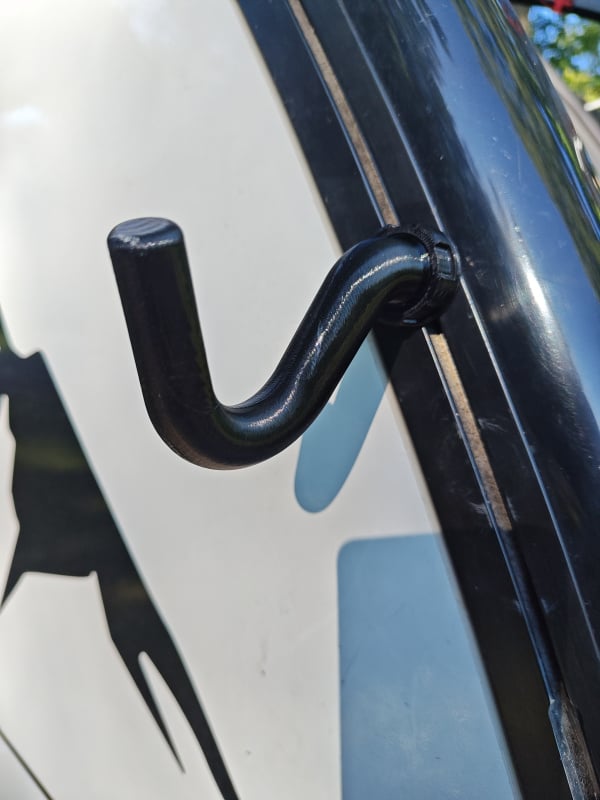
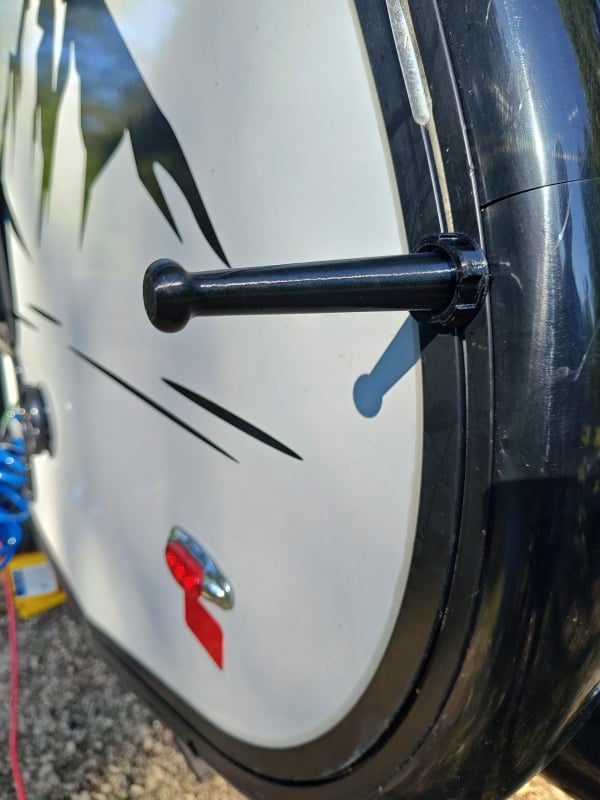
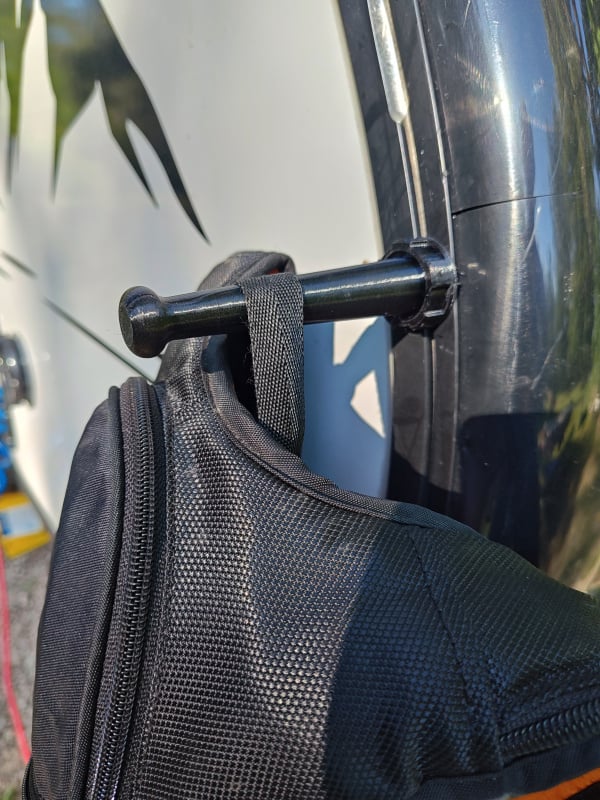
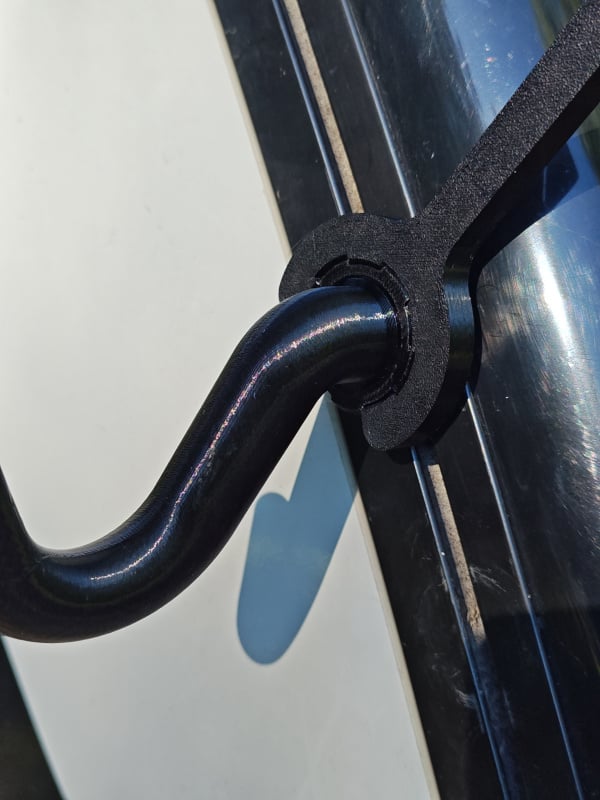
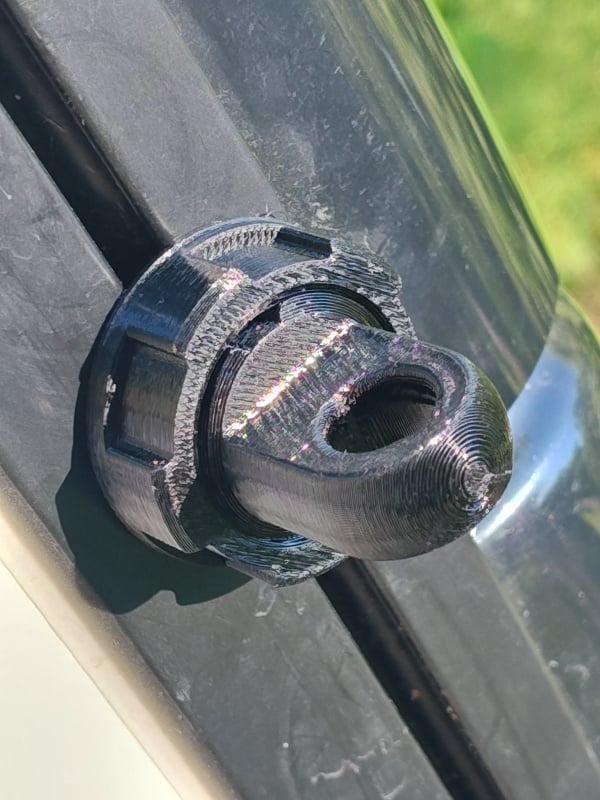
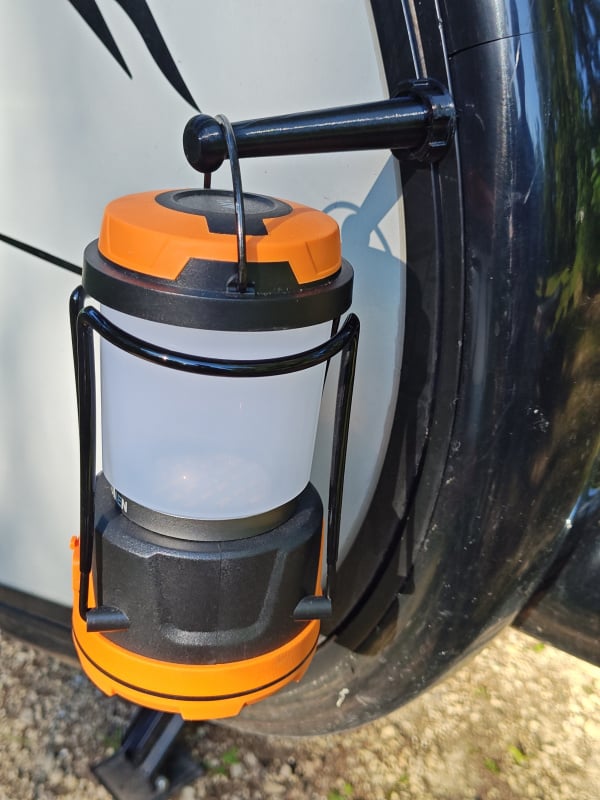
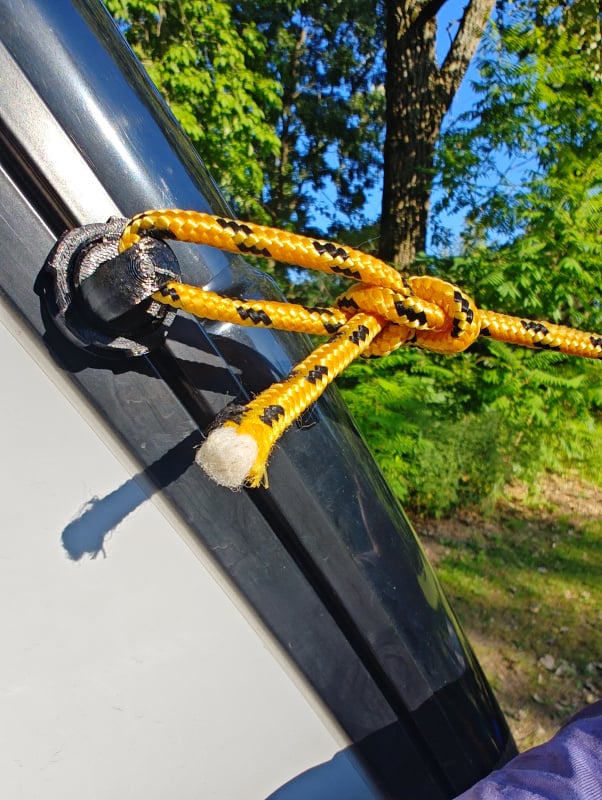
Keder Rail Accessories For Sale
I've been bugging my son to make me some custom accessories for the keder rail. (He's an engineering design student.) He made some prototypes this spring and they worked out really well so I figured I would share this product to the group if anyone is interested.
He does custom 3D design and printing on the side but has not put these on his storefront yet. But if you want them you can contact him directly at Ben.Vrakas@gmail.com. He's put together a 'starter pack' that includes 2 Hooks, 2 Studs, 4 Rings and a custom wrench. That is $49, which does include shipping to the continental US. I think if he has time he would be able to do custom changes or colors.
It's UV resistant 3D printed solid resin. They are quite strong but not suitable for really heavy loads. We use ours for awning anchors, coat hooks, towels, lantern, shower head, clothesline, bike helmets, etc.
 Gomers2
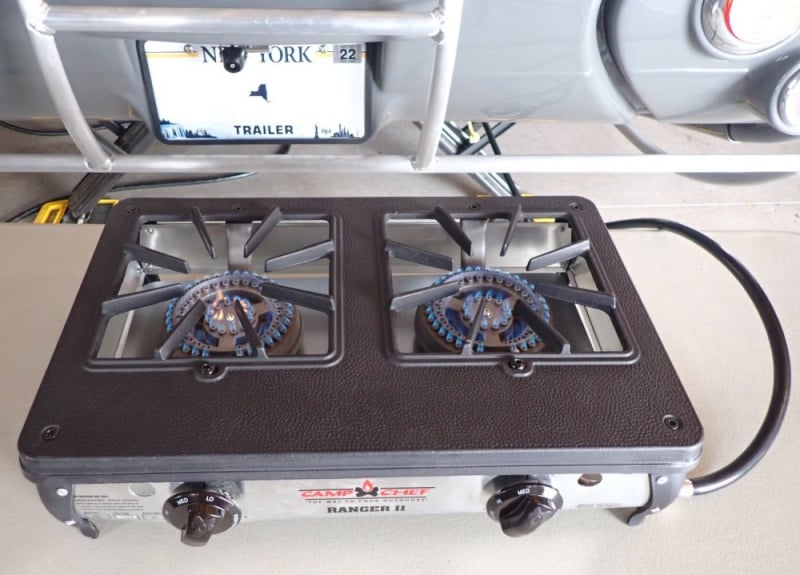
Re: low pressure campstove
We've been using a Camp Chef Ranger II stove for four years now. First three years connected to the low pressure connector on our T@B and the last year on a Y directly off the tank.
 SLJ
SLJ
Re: 320s non-Boondock ground clearance
IMHO, the only realistic approach is to replace the Axle with the Boondock 'pitched' axle.
{this figure shows the axle pitch . . in the early years a Boondock was named 'Outback'}
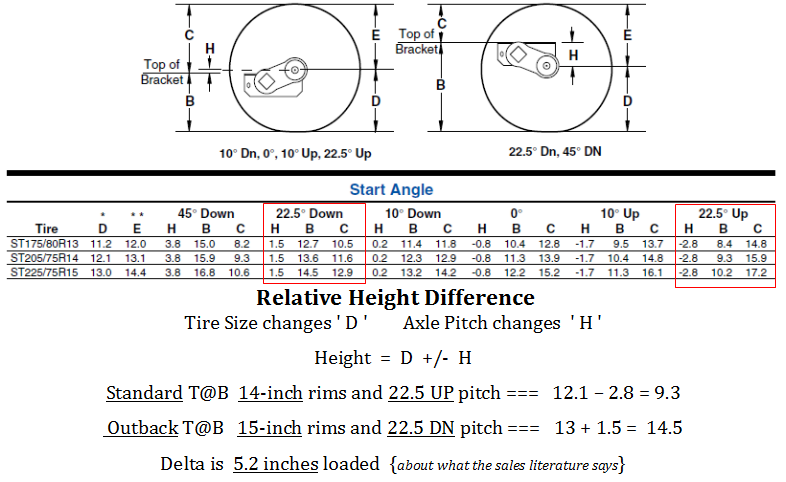
As the Torsion Axle mounting method does not allow 'added blocks', etc that is possible with a leaf spring axle.
Re: Repair Hail Dings or Not?
vhollow